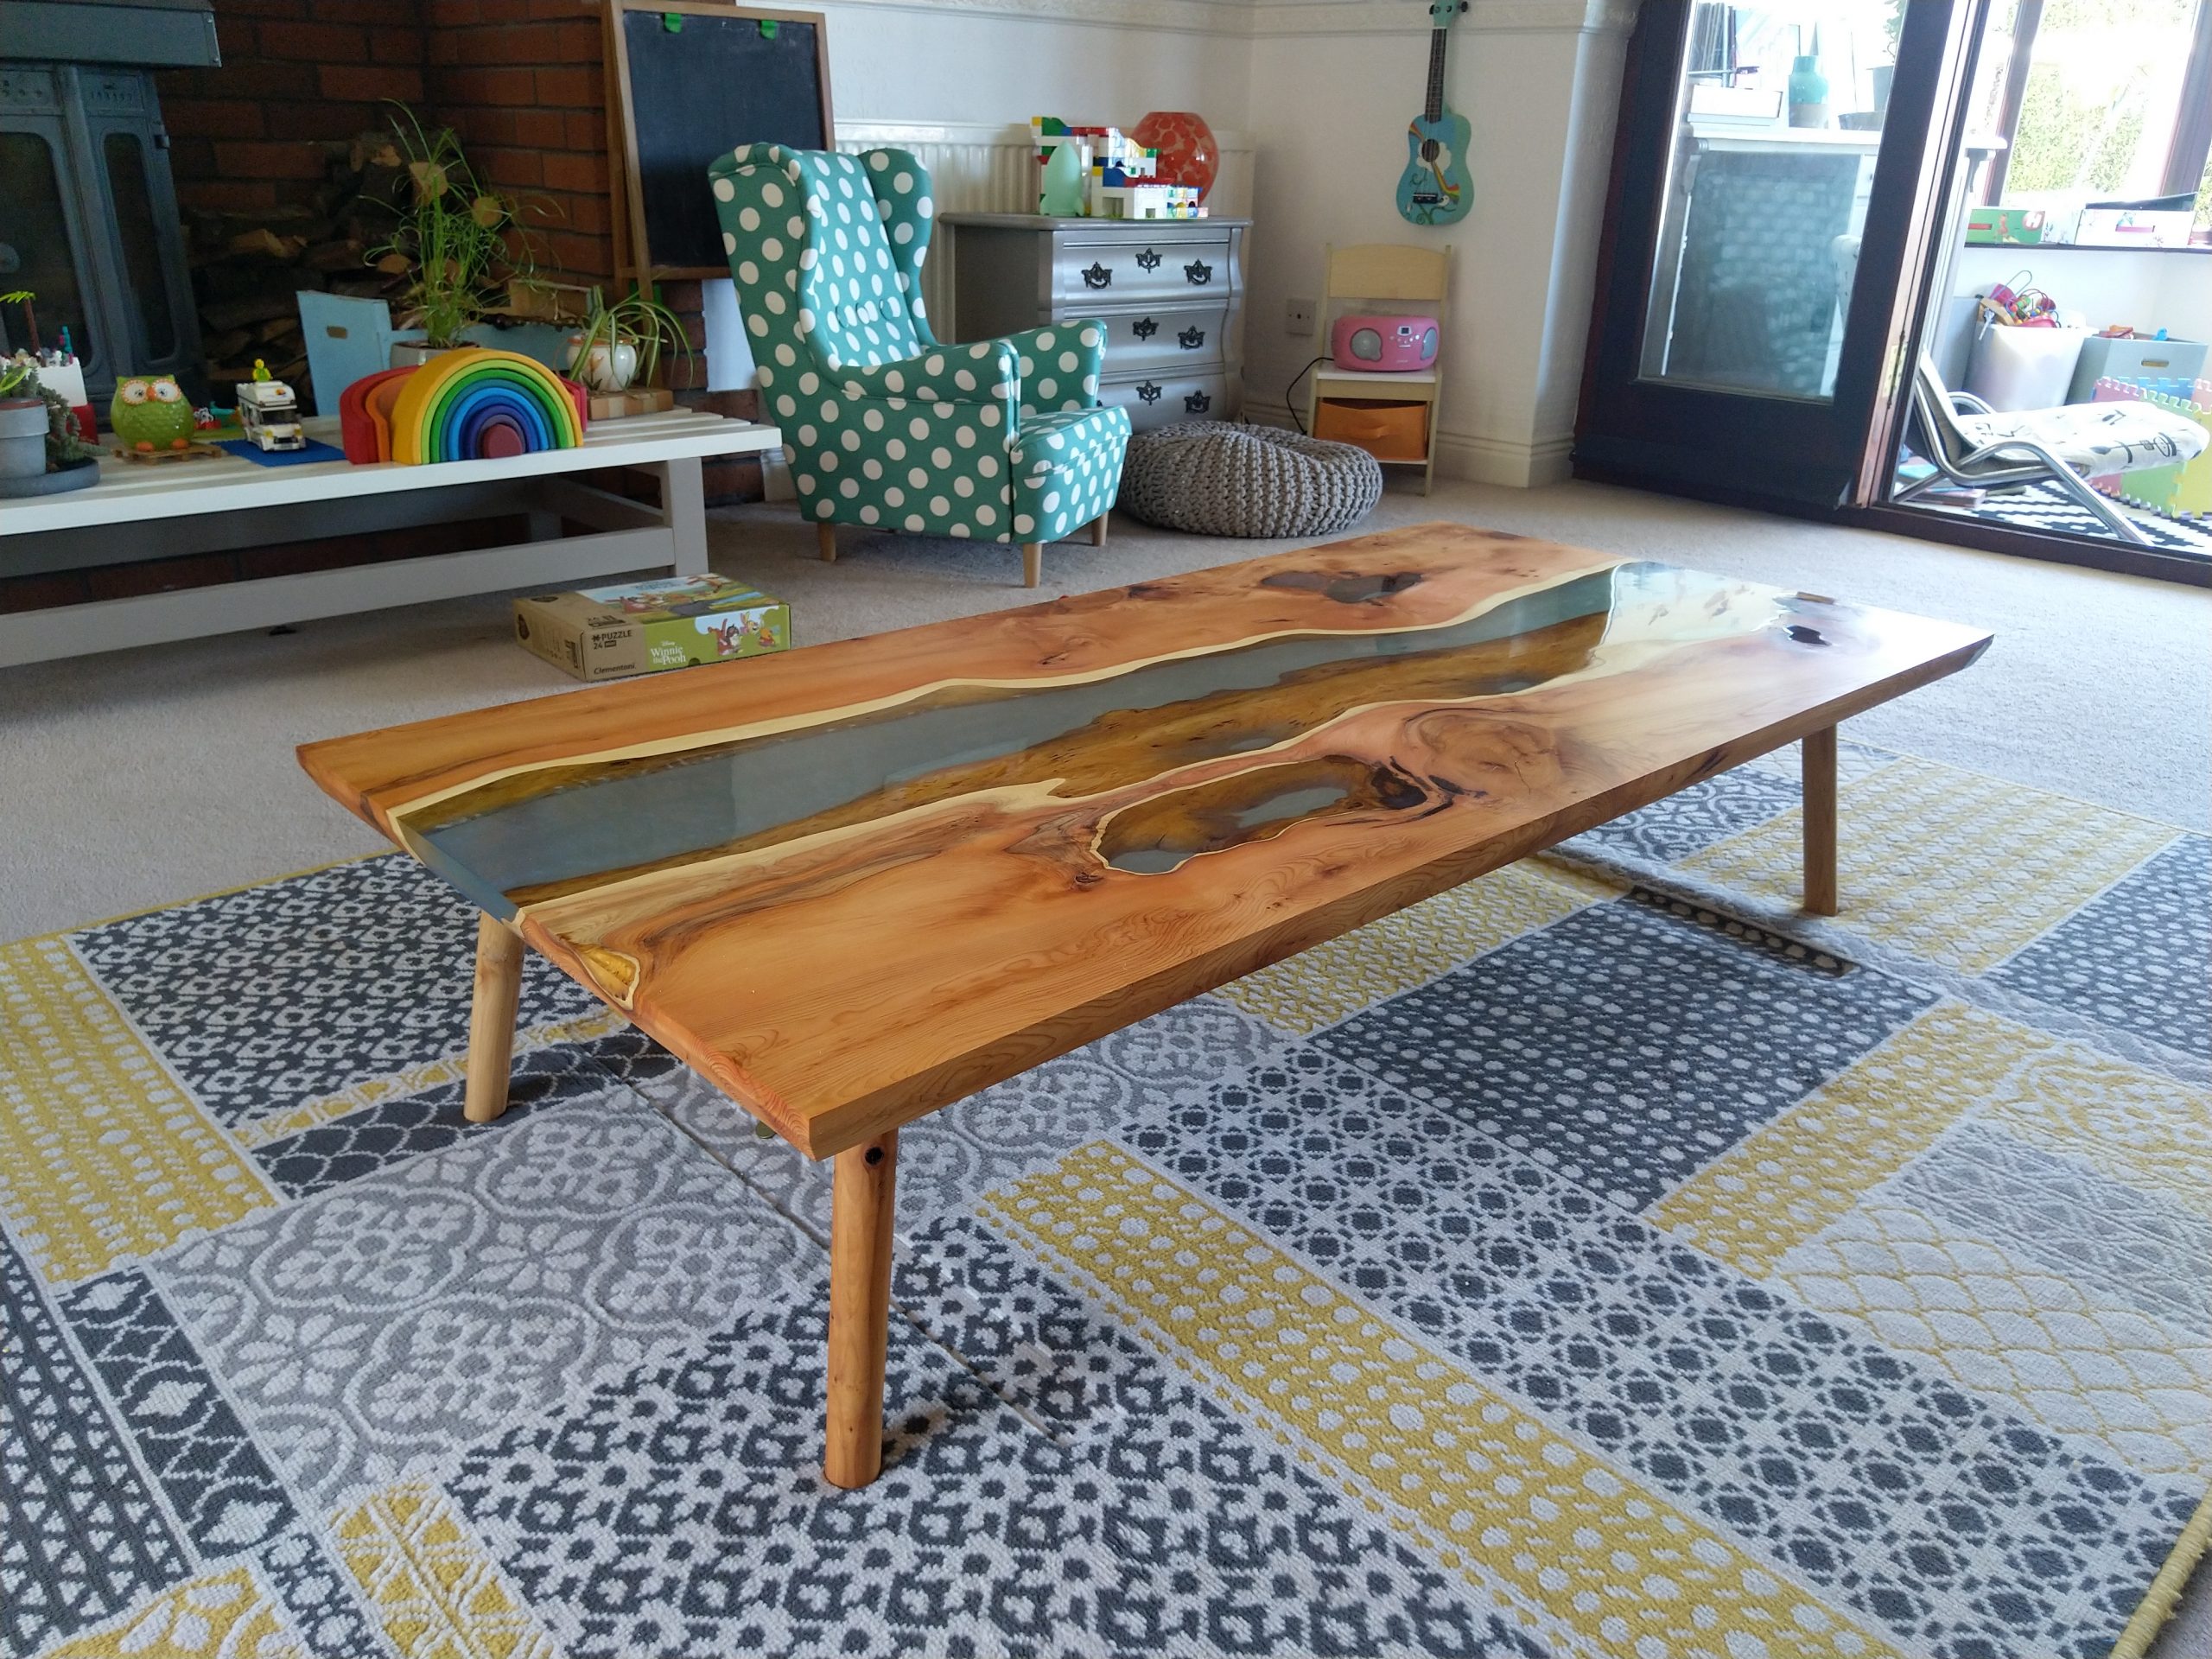
On the internet I came across some nice rivertables. These are tables with a ‘river’ of epoxy in the middle. They are one of a kind, especially when its bark is the bank of the river. Many tutorial videos are available, but I mostly watched the videos from Blacktail Studios. Cal is really a master in these tables and makes the most wonderful things. His tutorials are really good and prepare you for the job. If you are interested in making a rivertable yourself, I can really recommend his channel.
After watching a couple of his videos I decided to make a coffee table myself. As I had never worked with epoxy I started out with some trial projects. The first was a small presentation board which turned out pretty amazing. The second project was the earlier described chessboard.
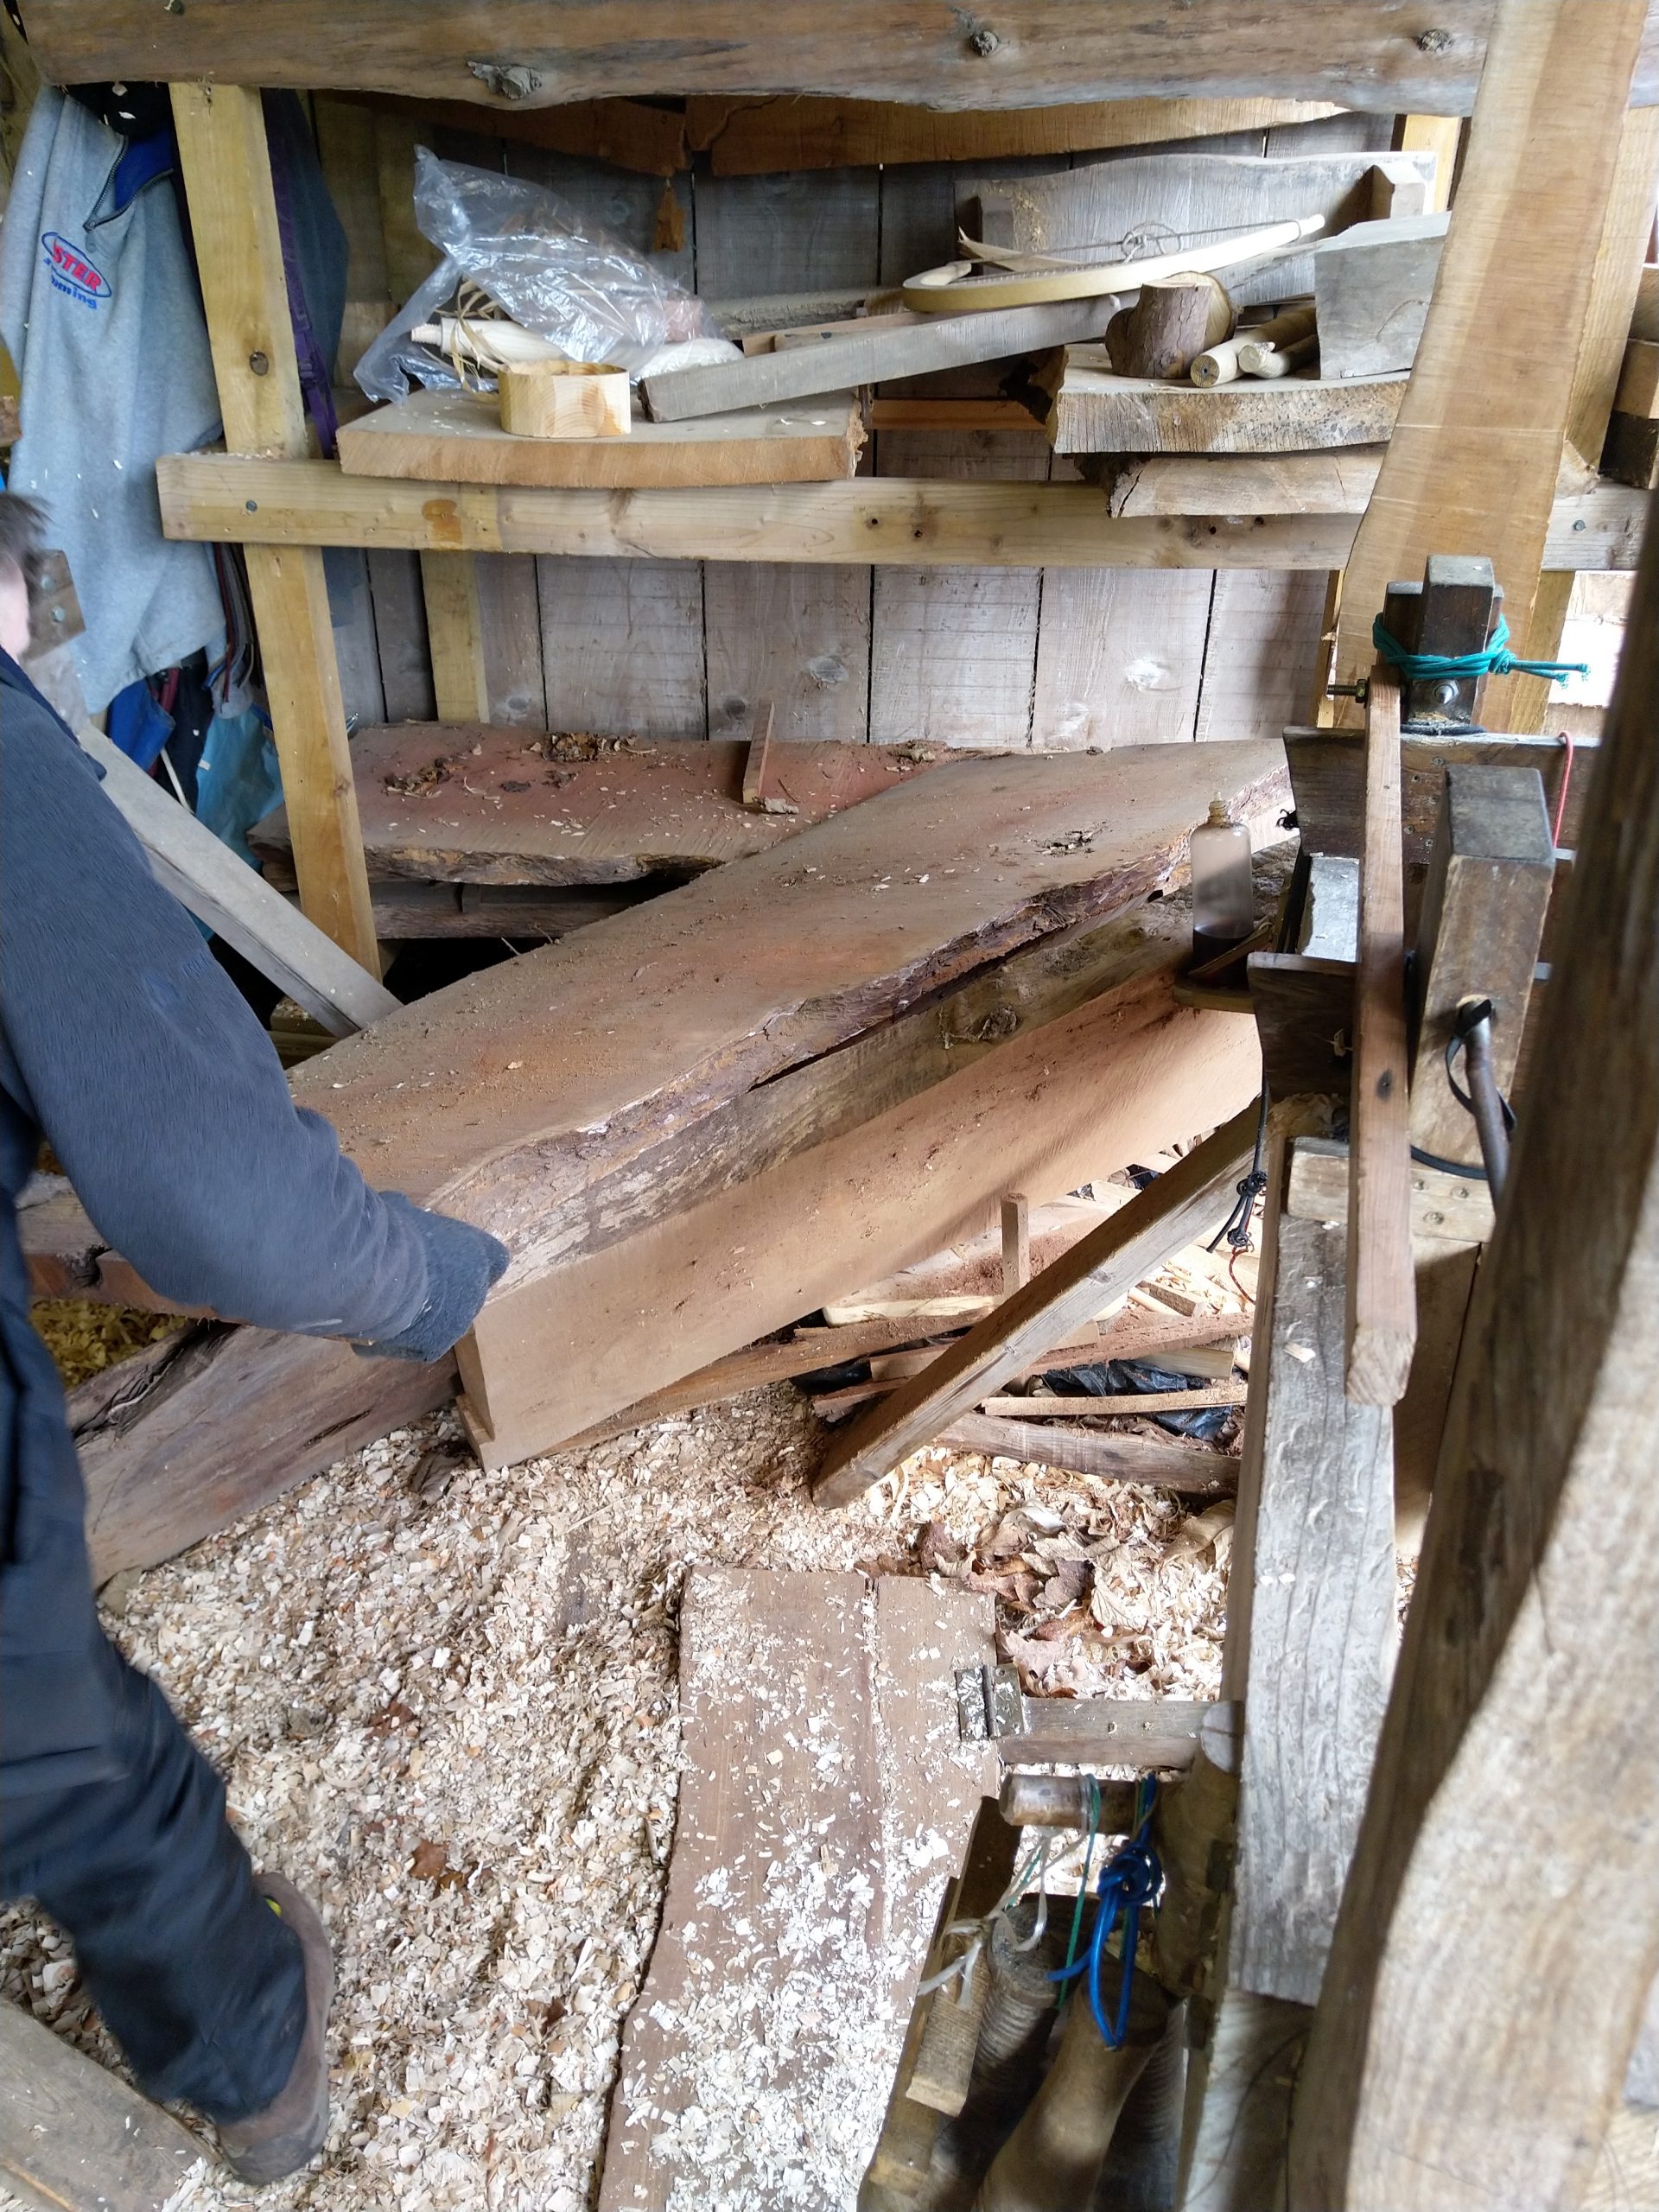
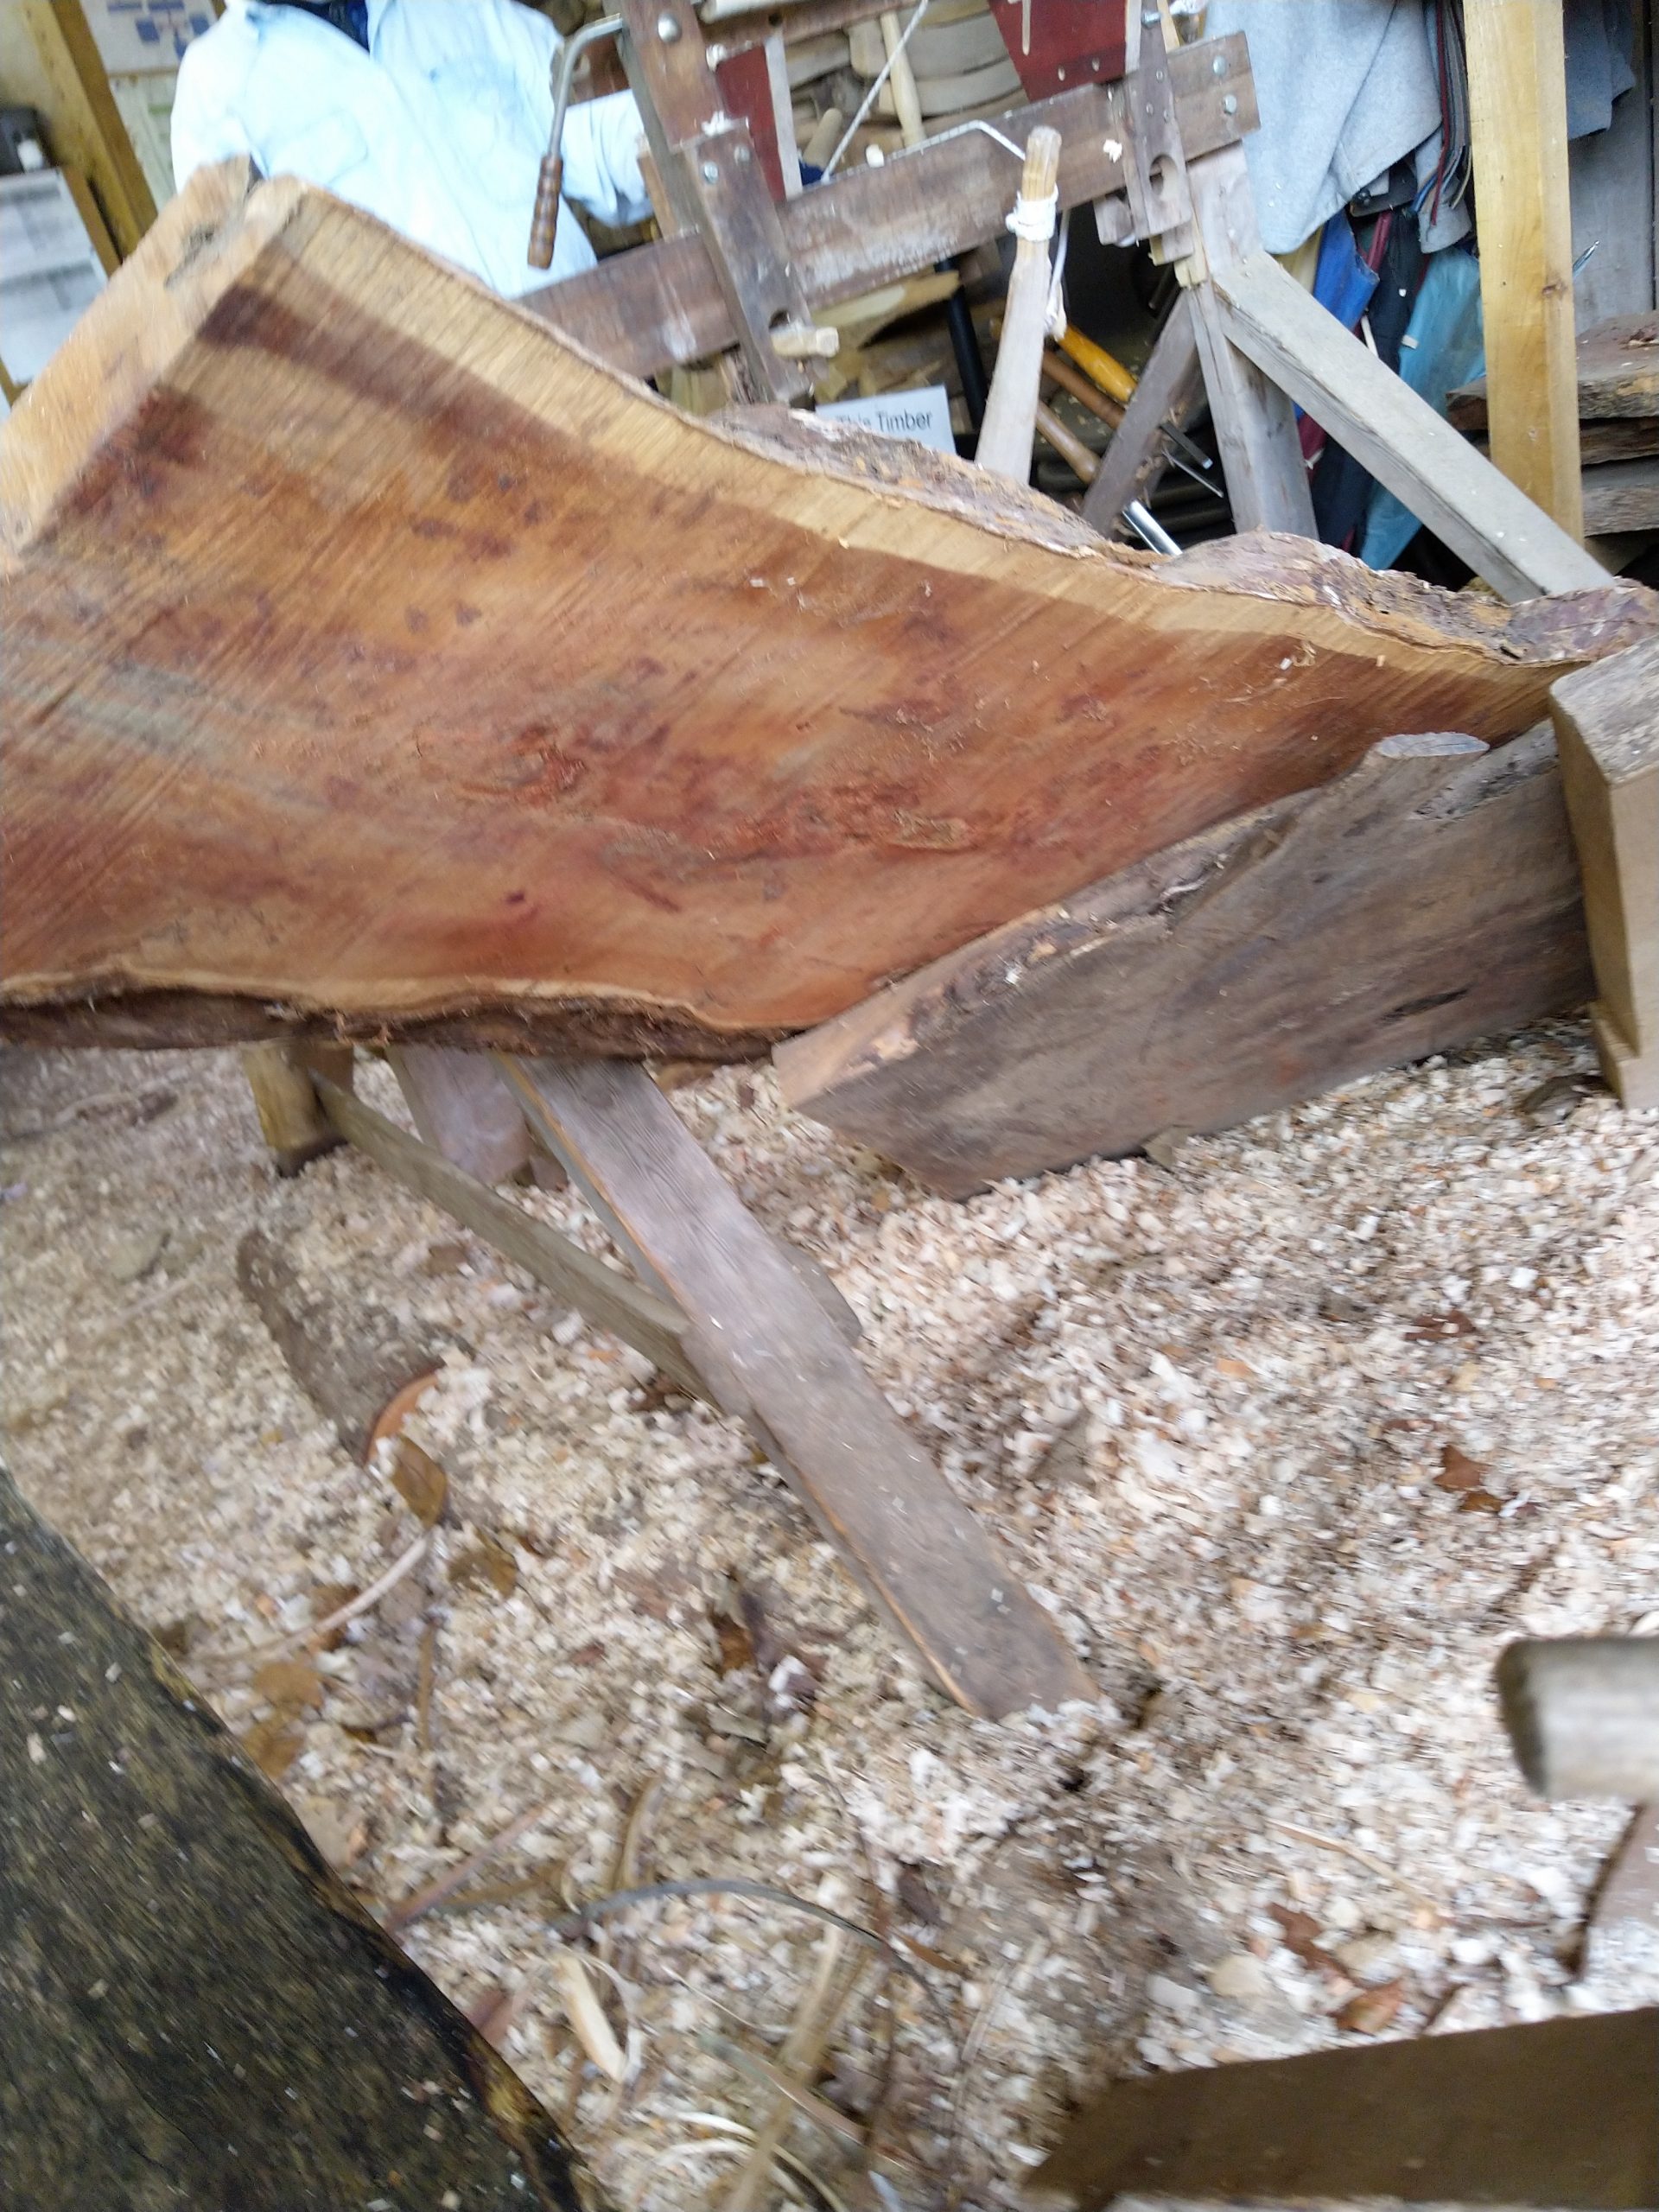
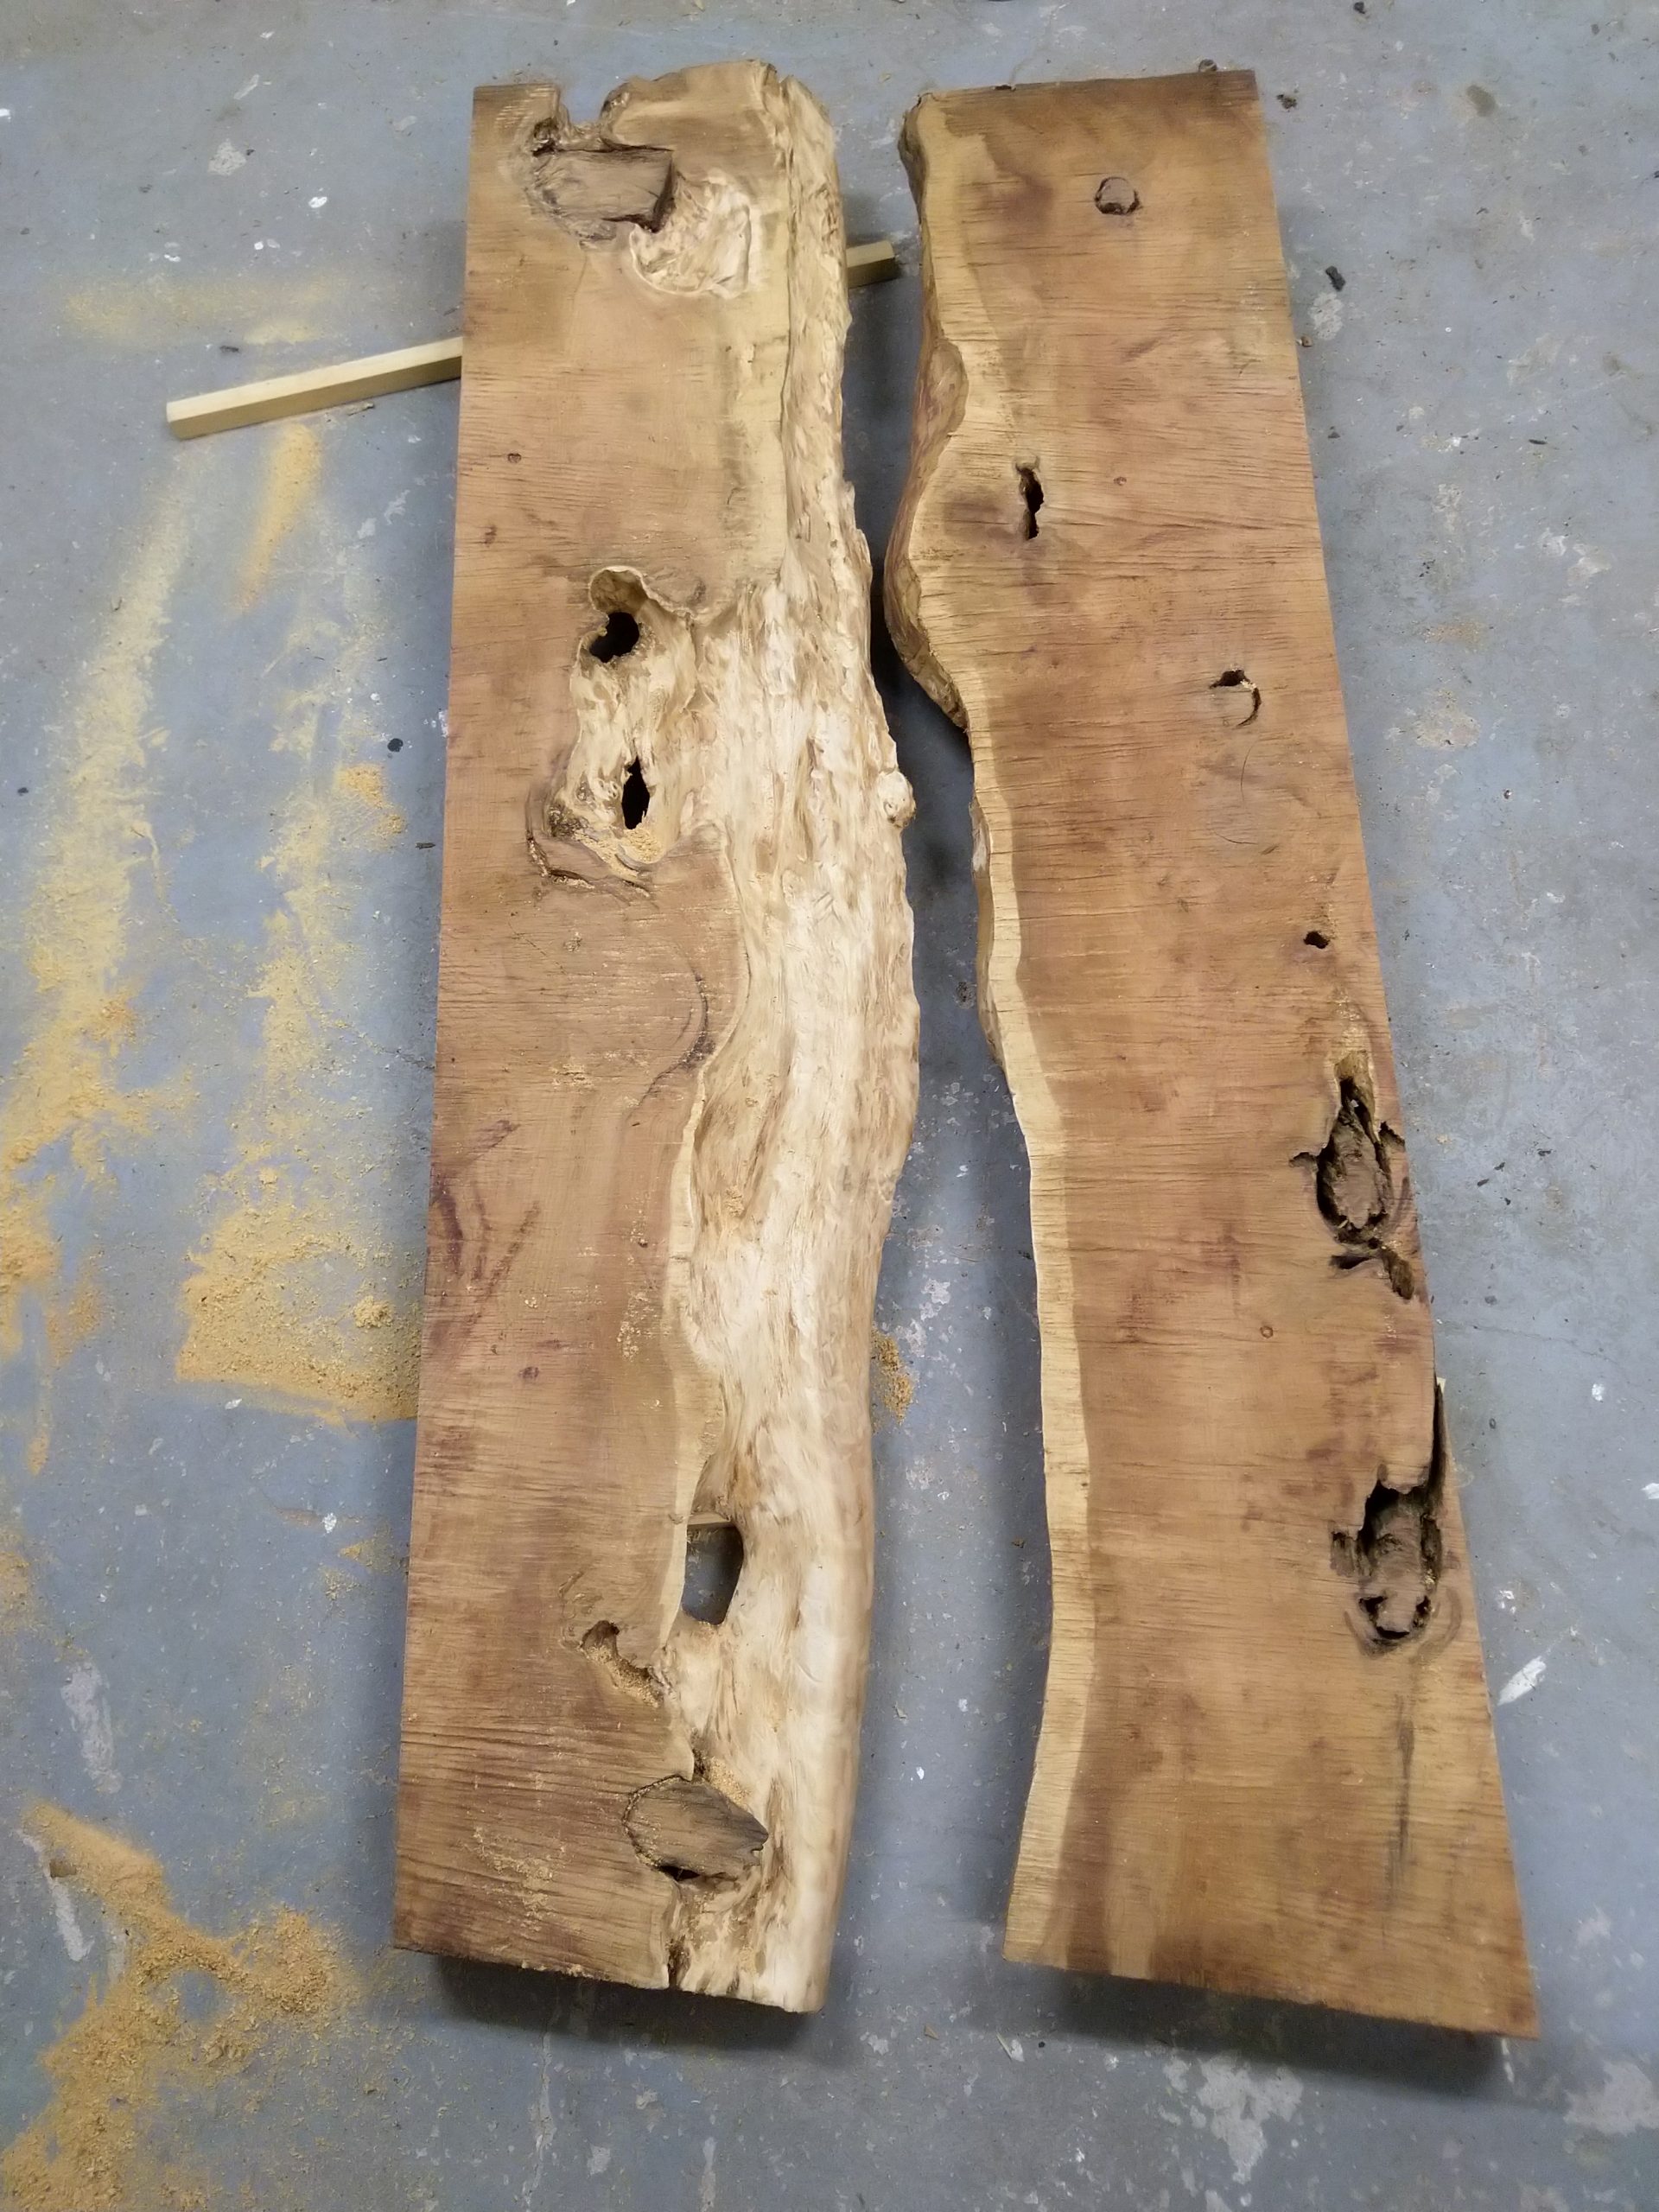
The next step was to find proper wood. I was able to purchase a nice slab of yew (NL: taxus) from my colleagues at the bodgers. It had been drying for a couple of years and we needed to peel it out of a big stack of lumber. I removed the bark from the edges with a steel brush angle grinder and sawed the slab in half. The two halves were a bit bent, and needed to be planed. This was done at by my friend James at Shoplands Sawmill.
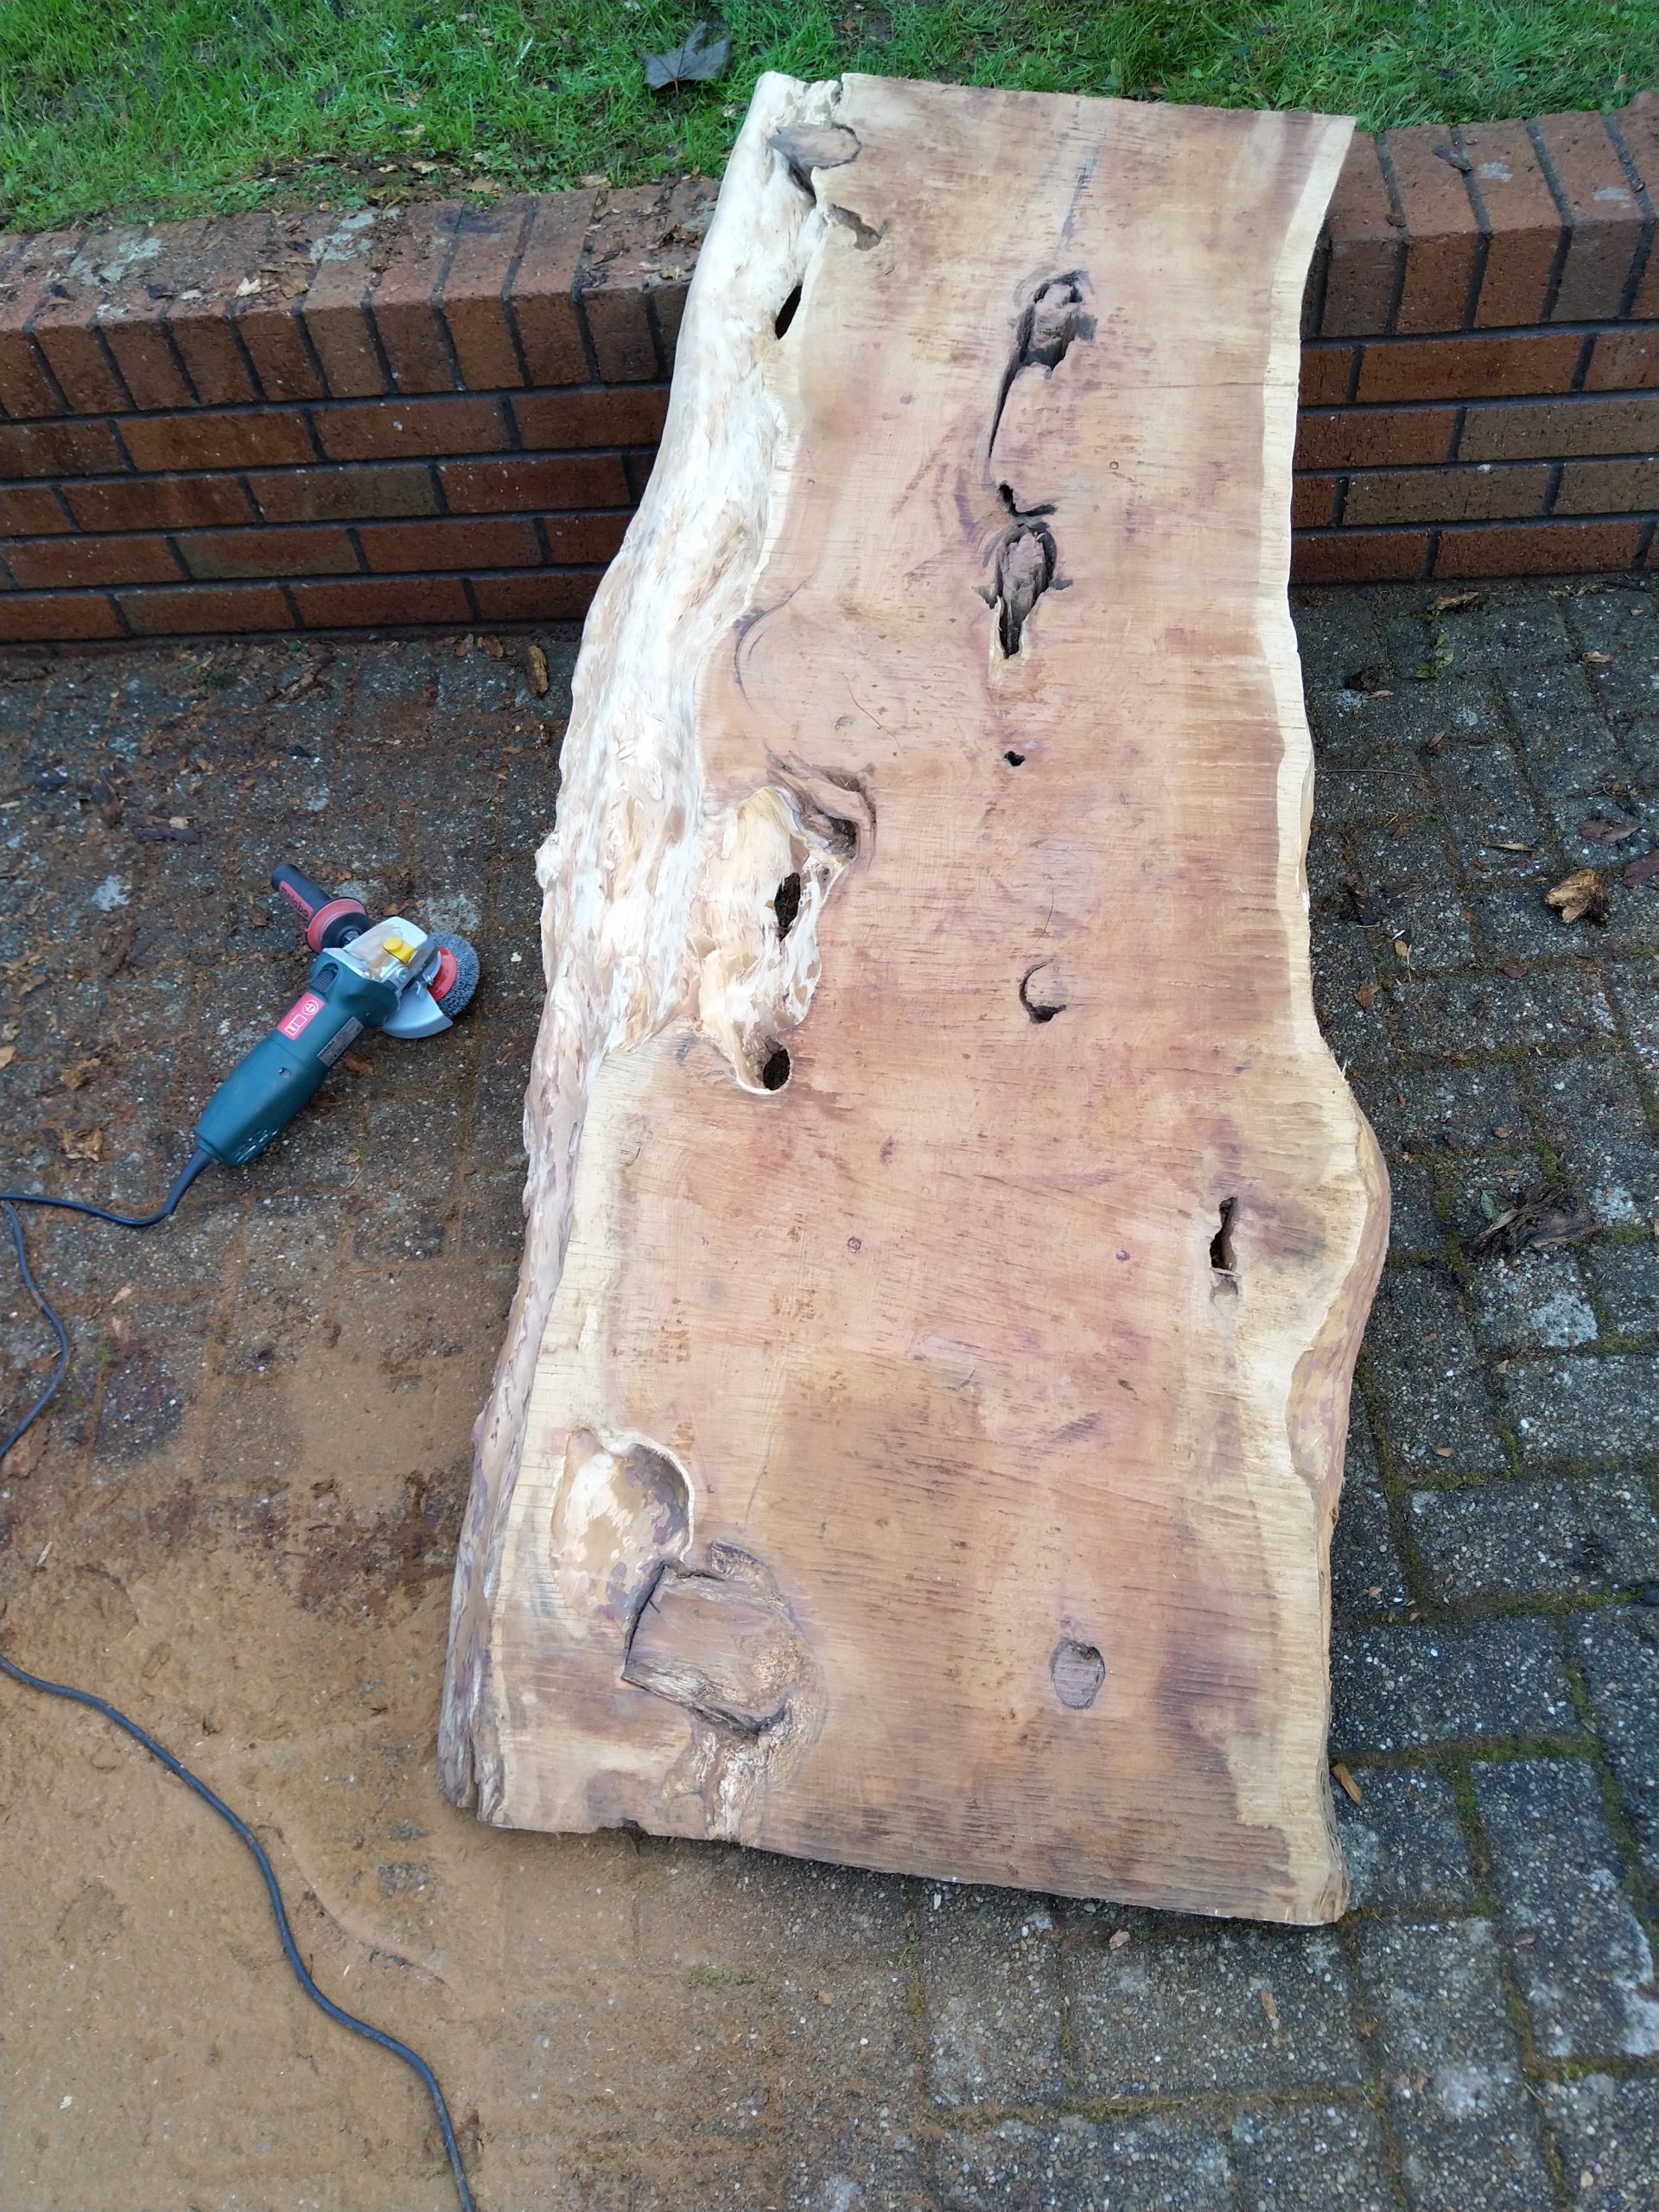
With a frame I laid out the basic shape and form and took off the excess wood. This gave a nice impression of how the table was going to look.
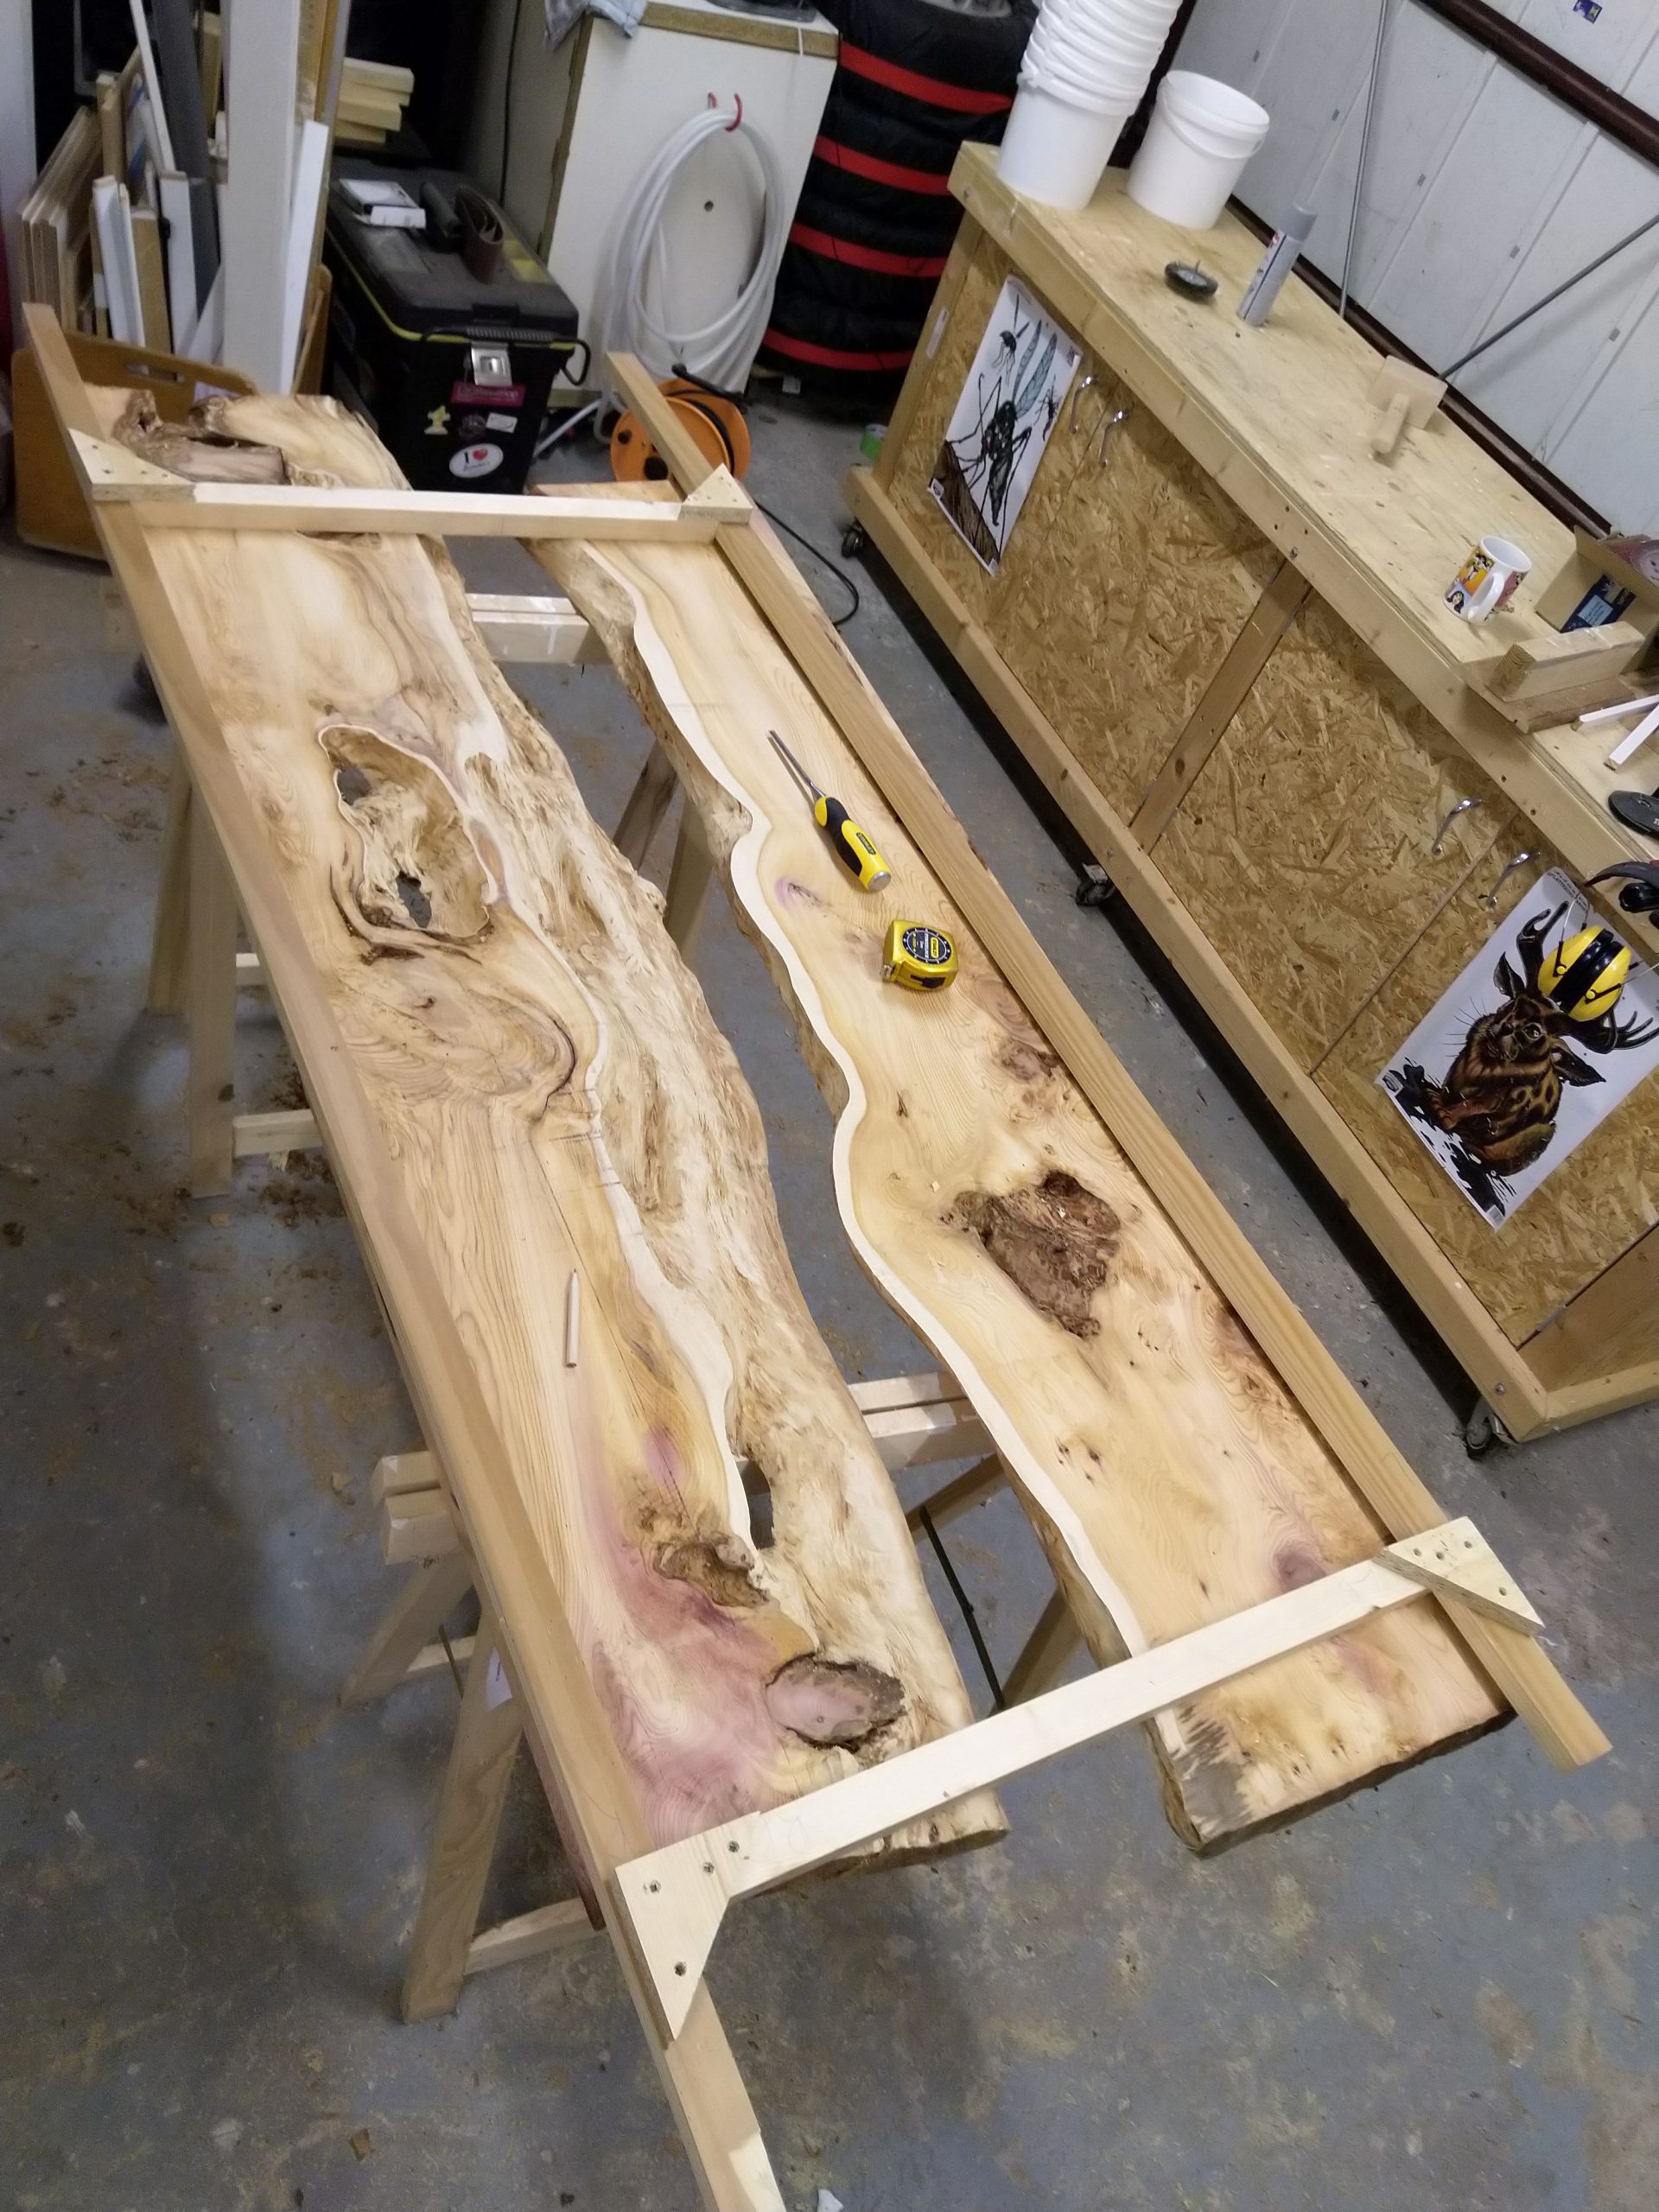
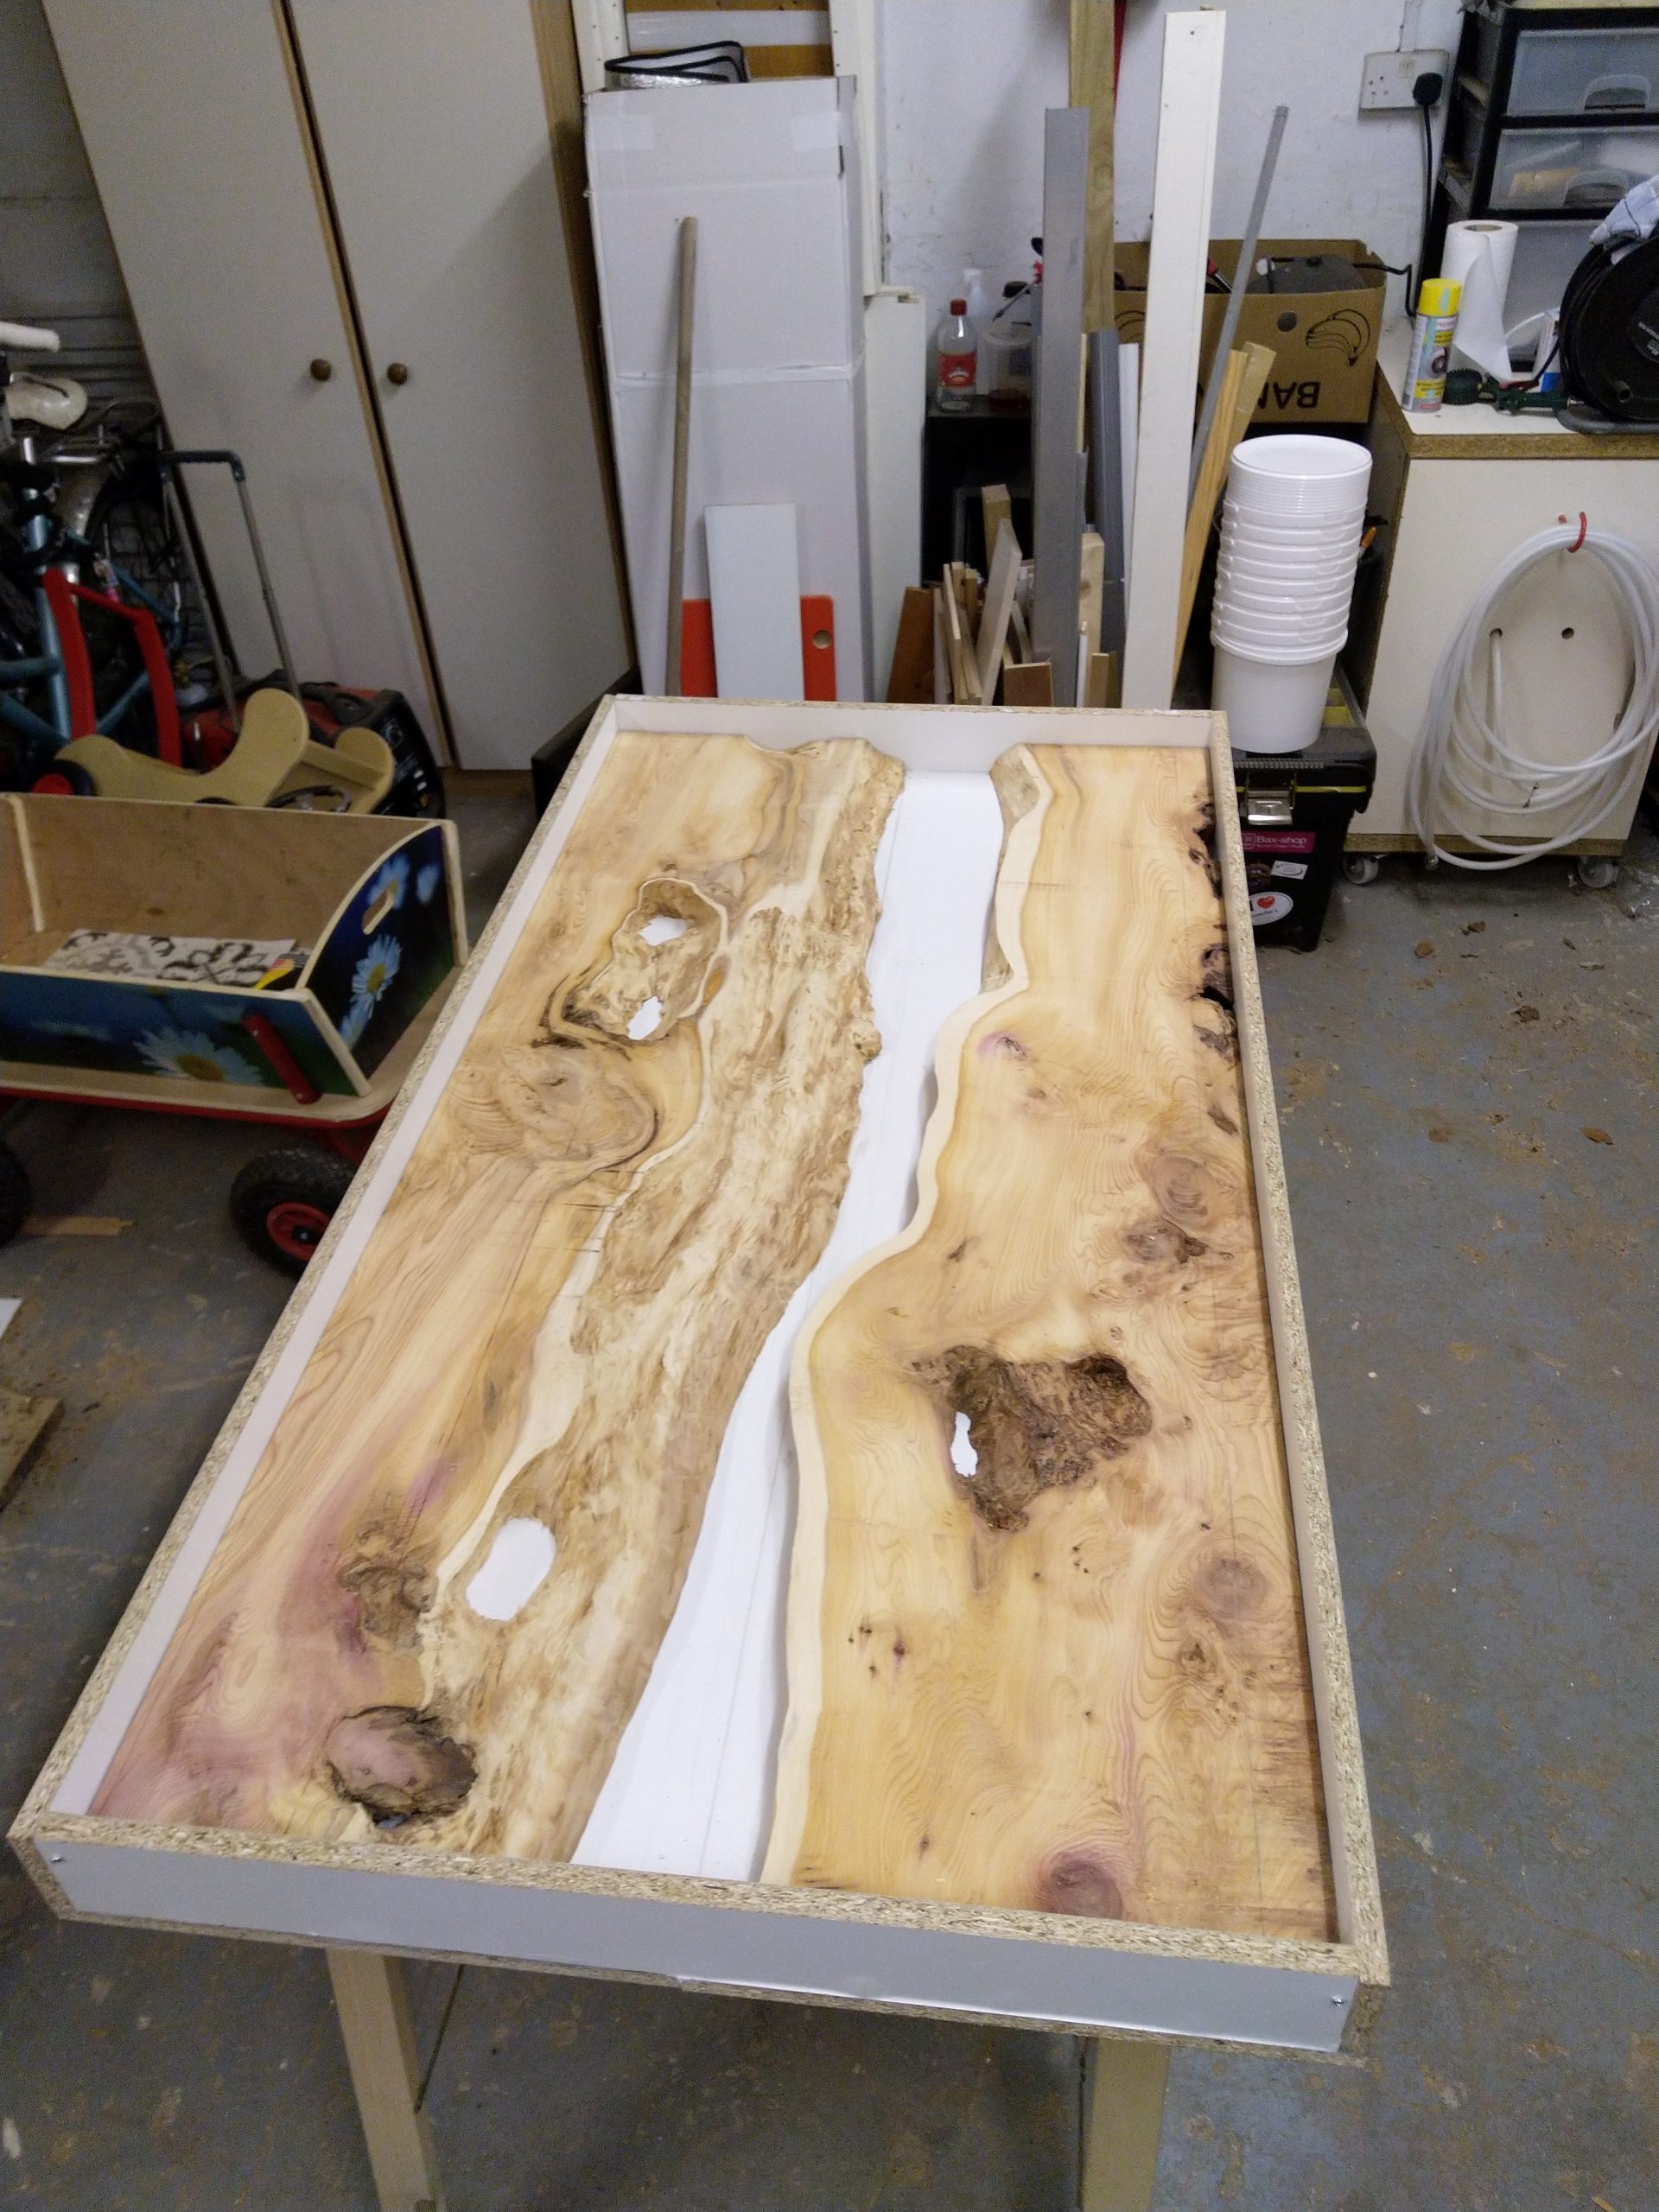
A big part of the job was to make the mold. The laminated chipboard from the local hardware store wasn’t wide enough, so I had to join two of them in the middle. All the edges were sealed with silicone sealant, especially the seam in the bottom of the mold.
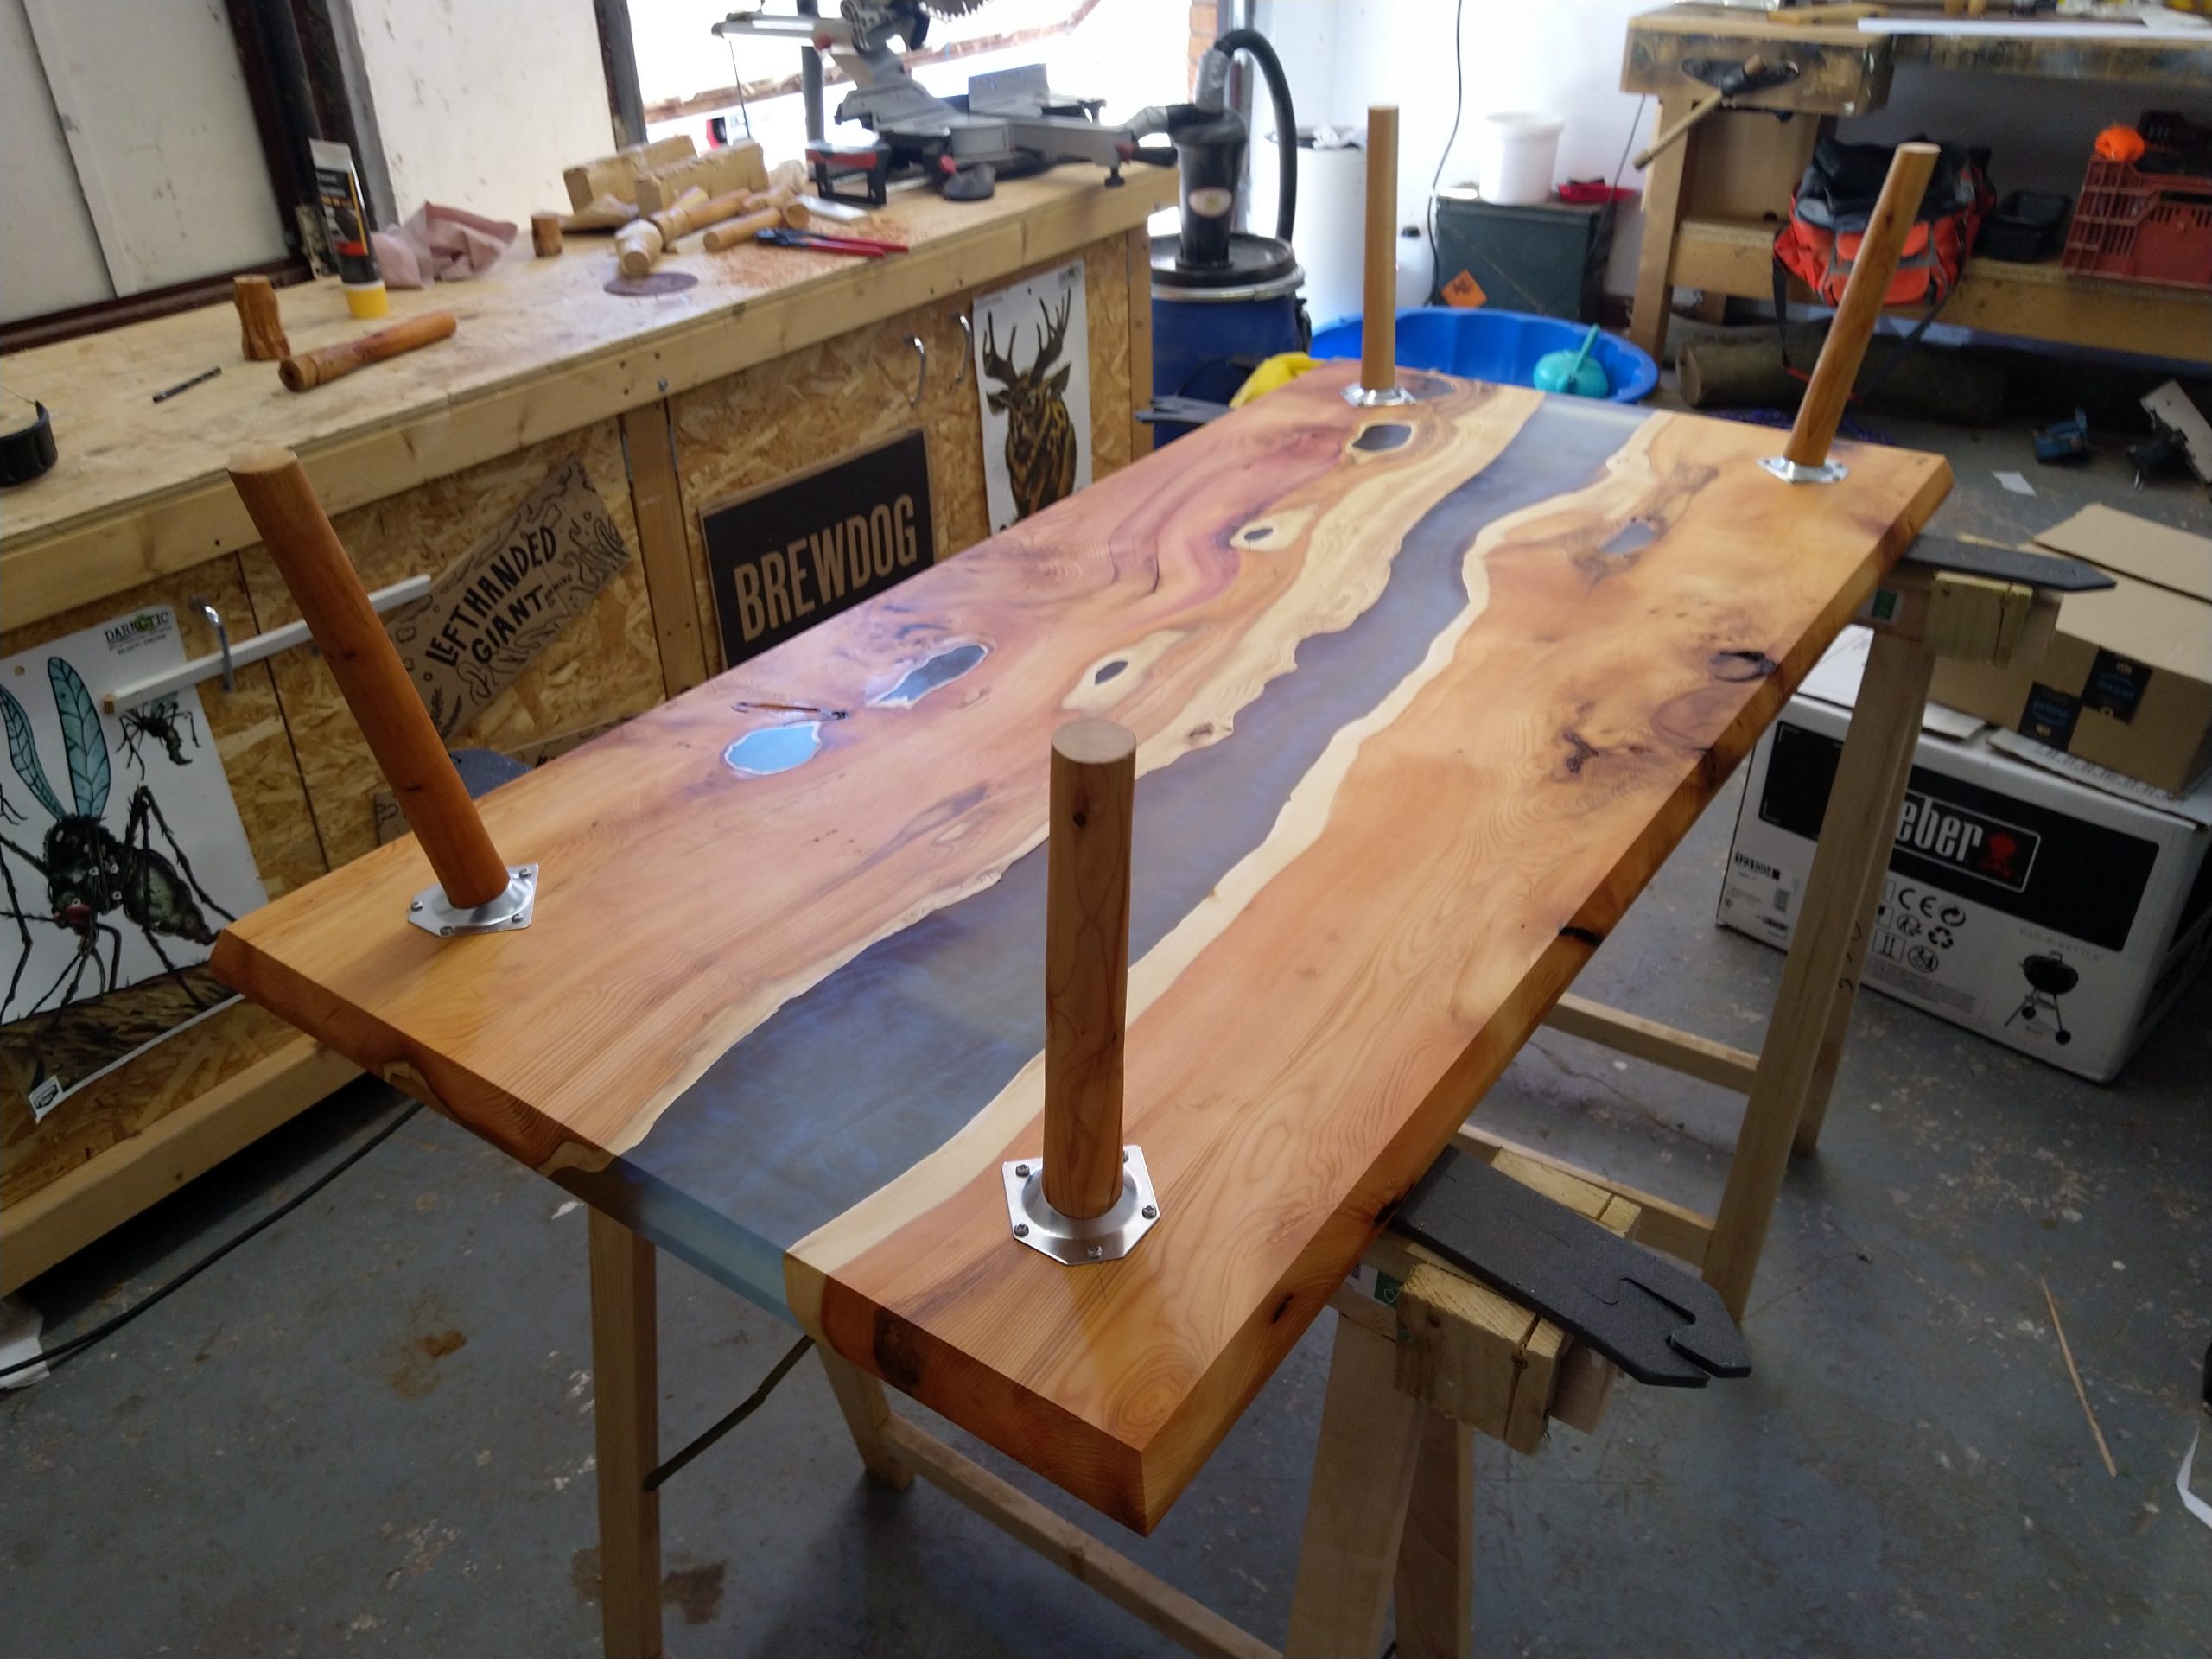
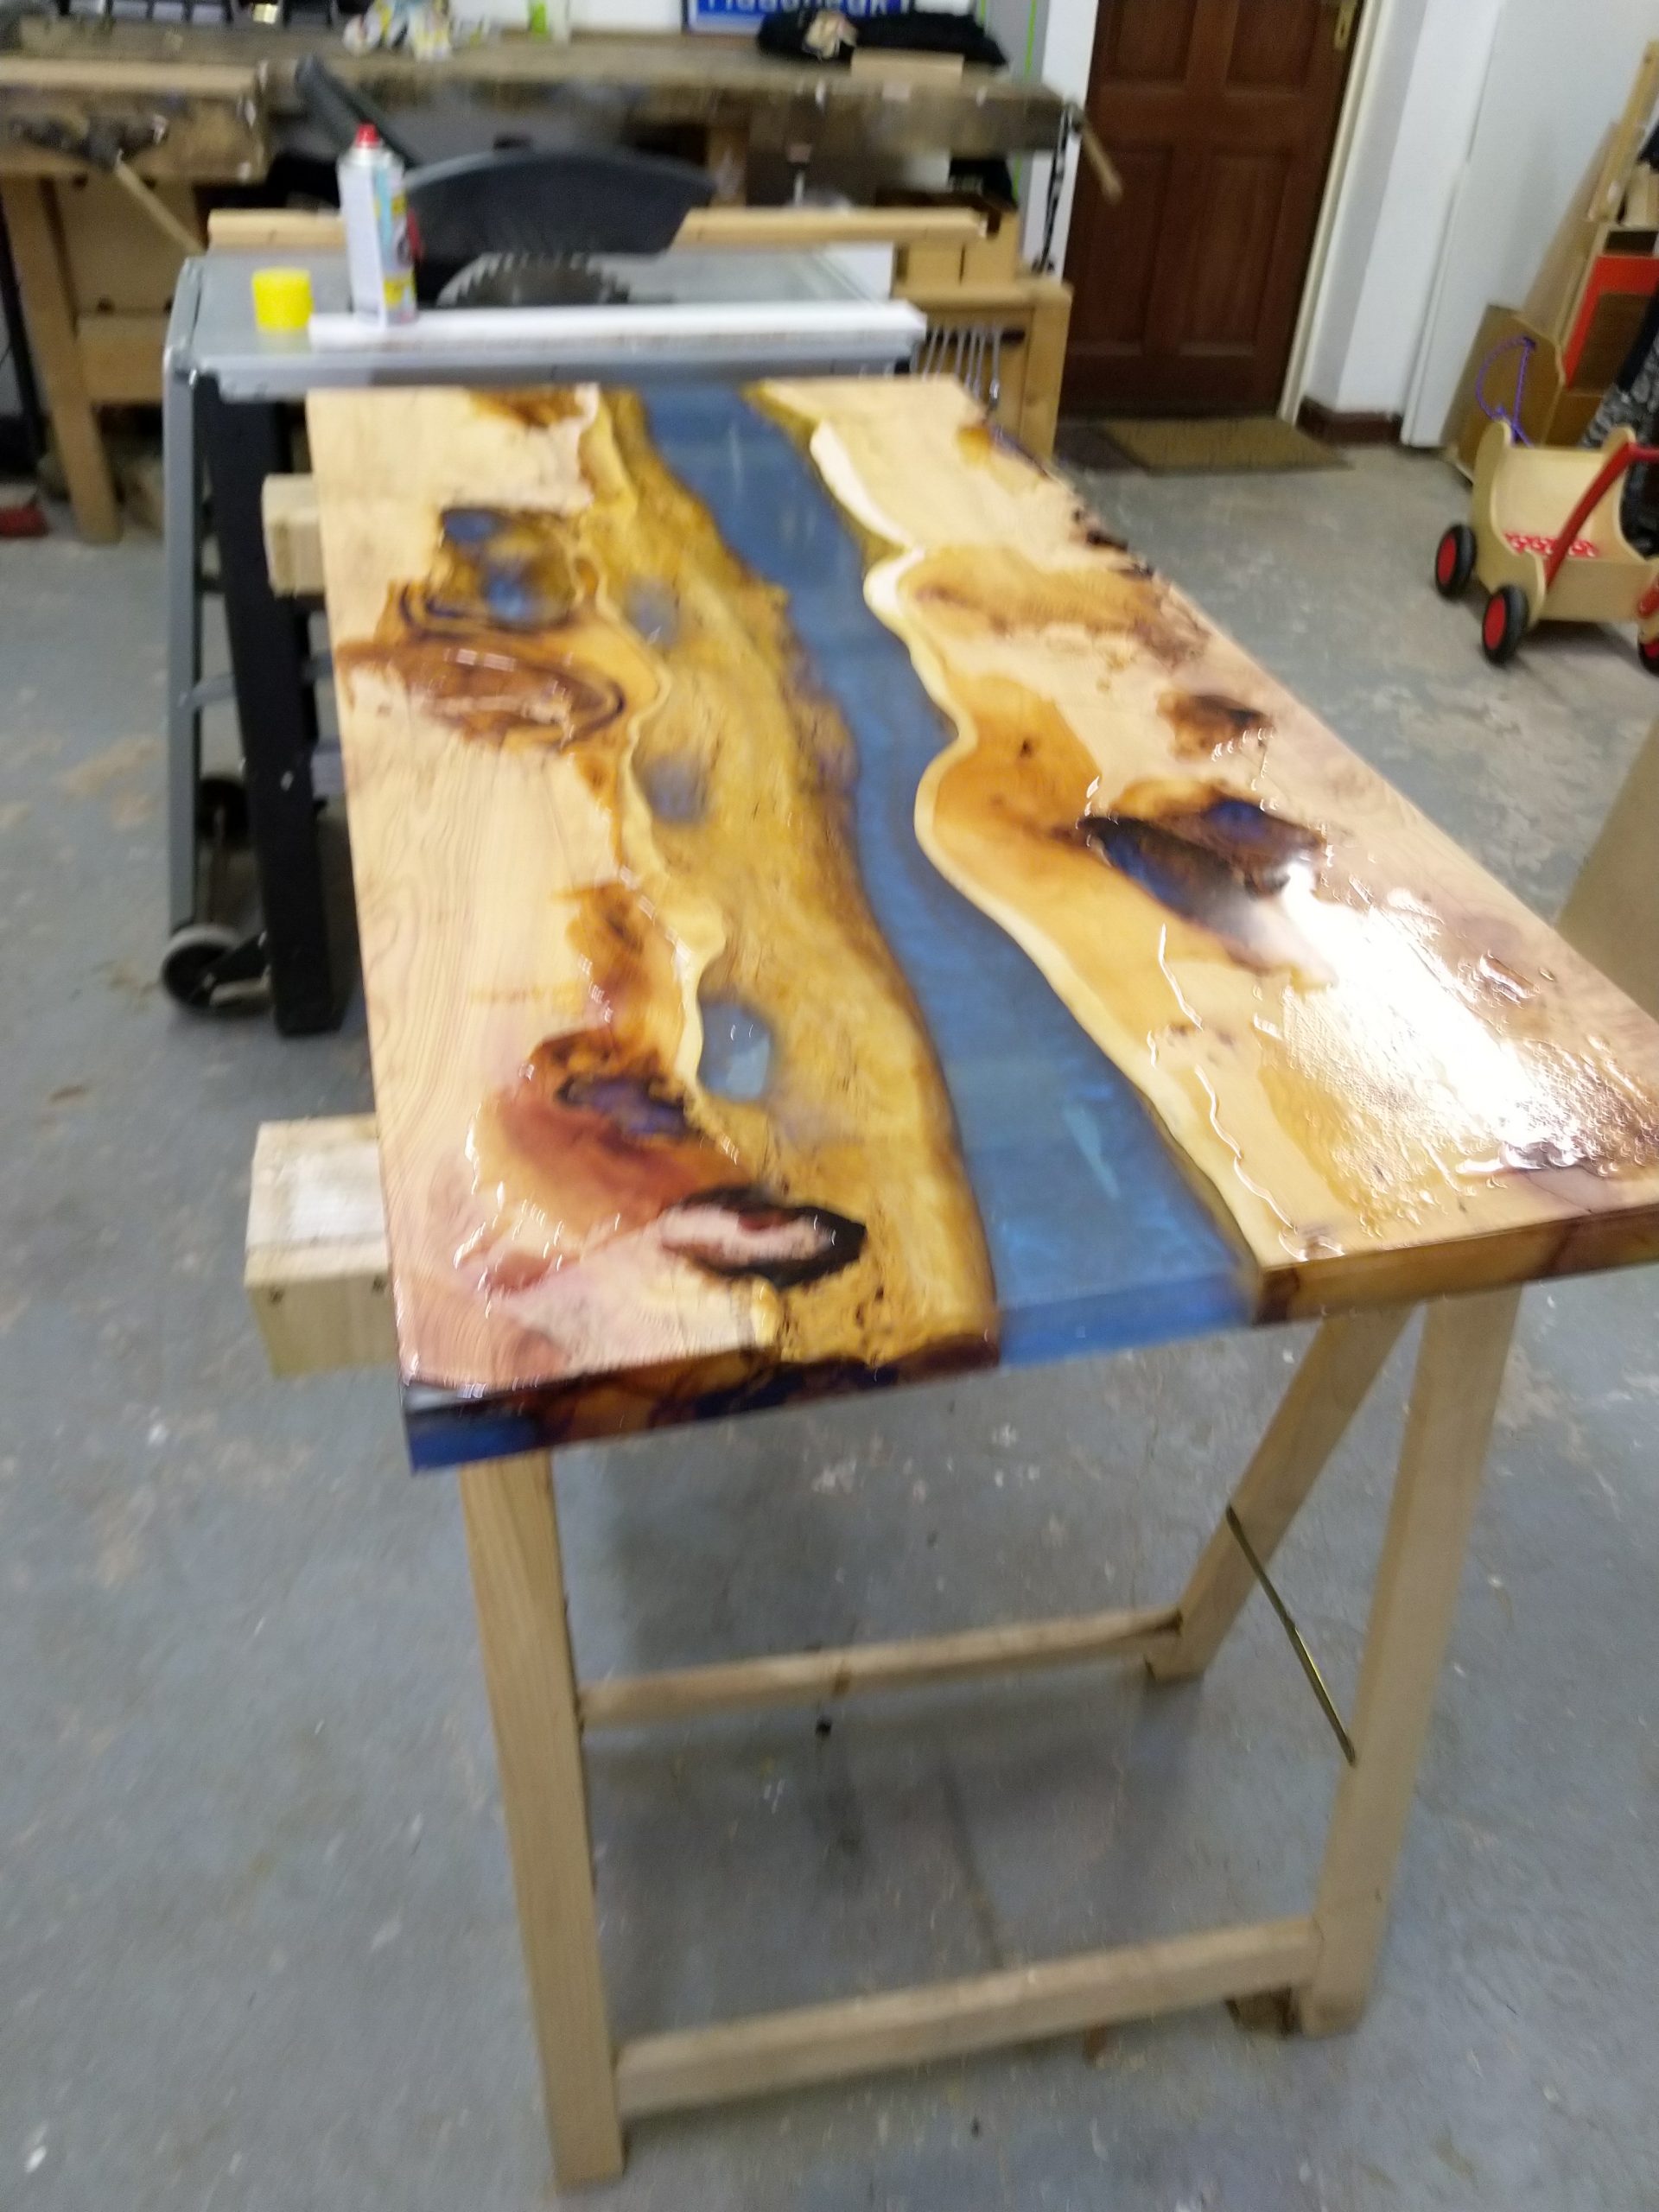
Before I could poor the first layer, I applied epoxy to all sides. This seals the wood and prevents bubbling and adhesion problems. After clamping down the slabs it was time to poor the first layer. This is a bit of a frightening step, as there is no going back from this point. To add contrast, I added a blue metallic dye to the mix. Enough for the blue colour, but still a bit translucent. This layer cured quite nicely, although a pocket of air underneath one slap kept on bubbling. Most of these were removed by heating the mix with a hot air gun. I did run into a more acute problem during pouring though: the seam in the middle was leaking! I quickly used clear tape and duct tape to seal the leaks.
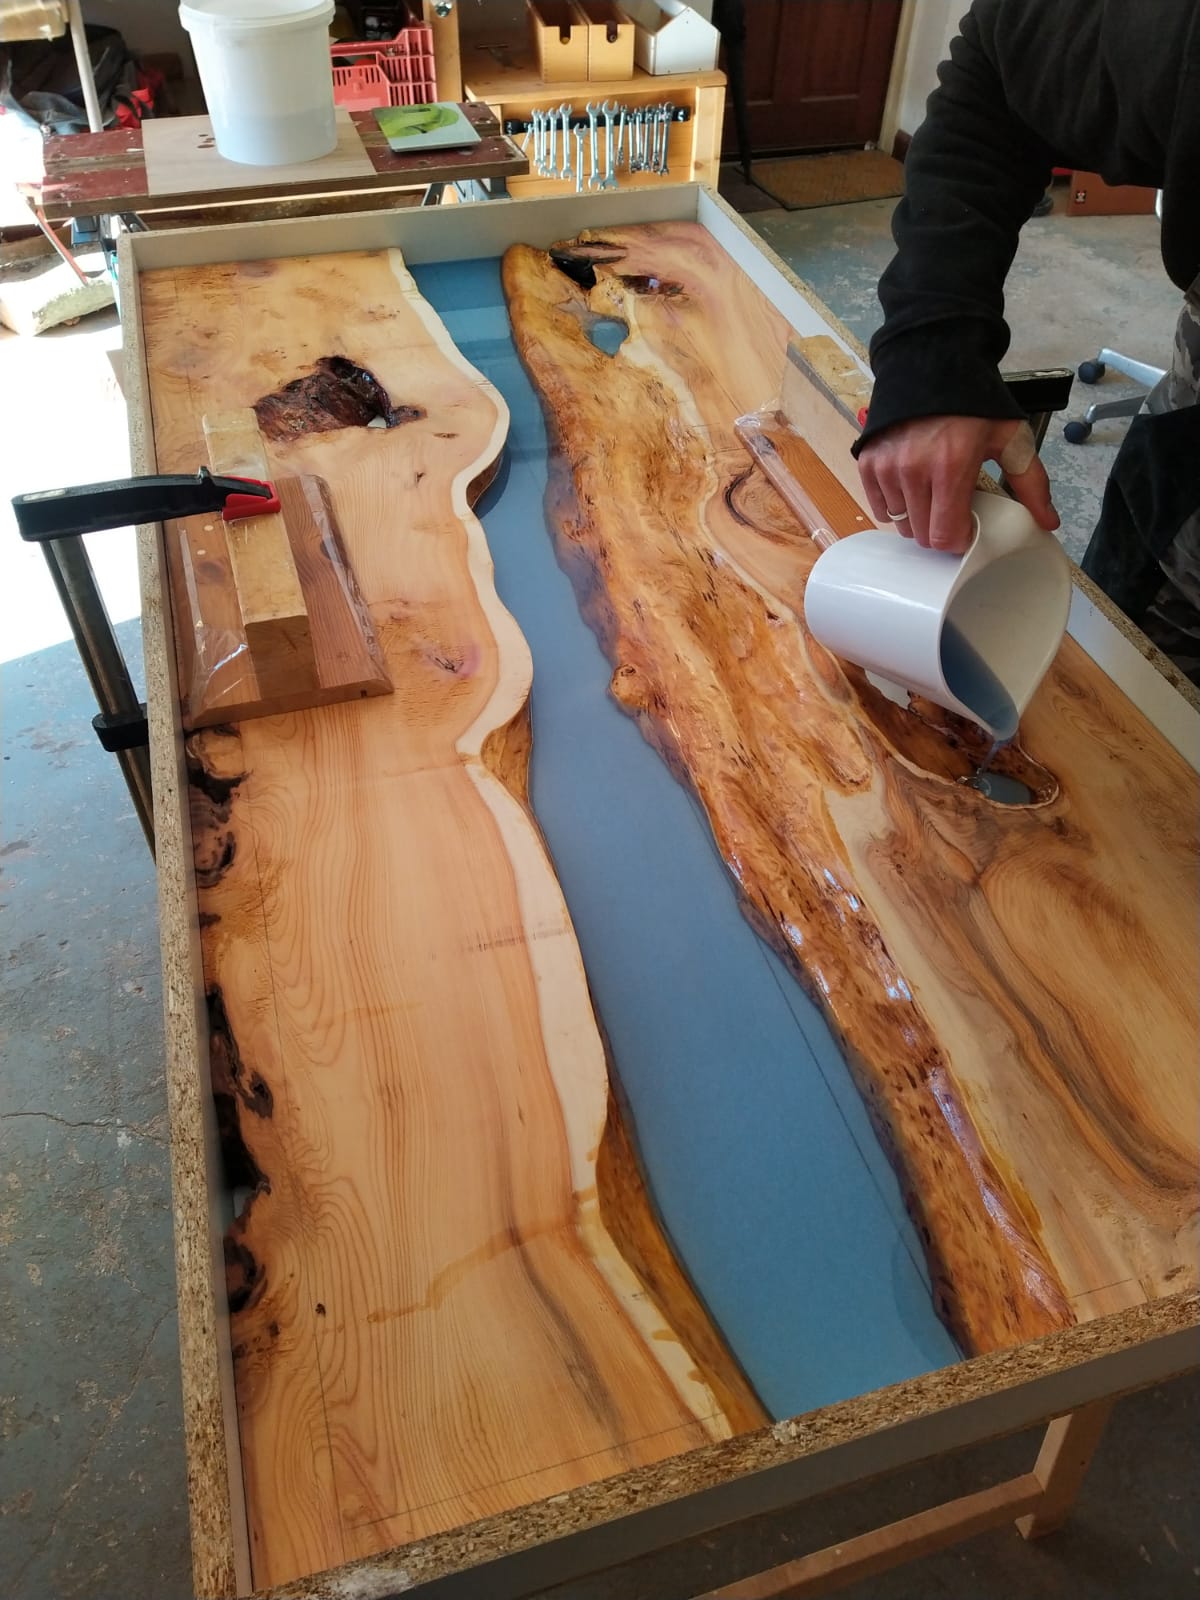
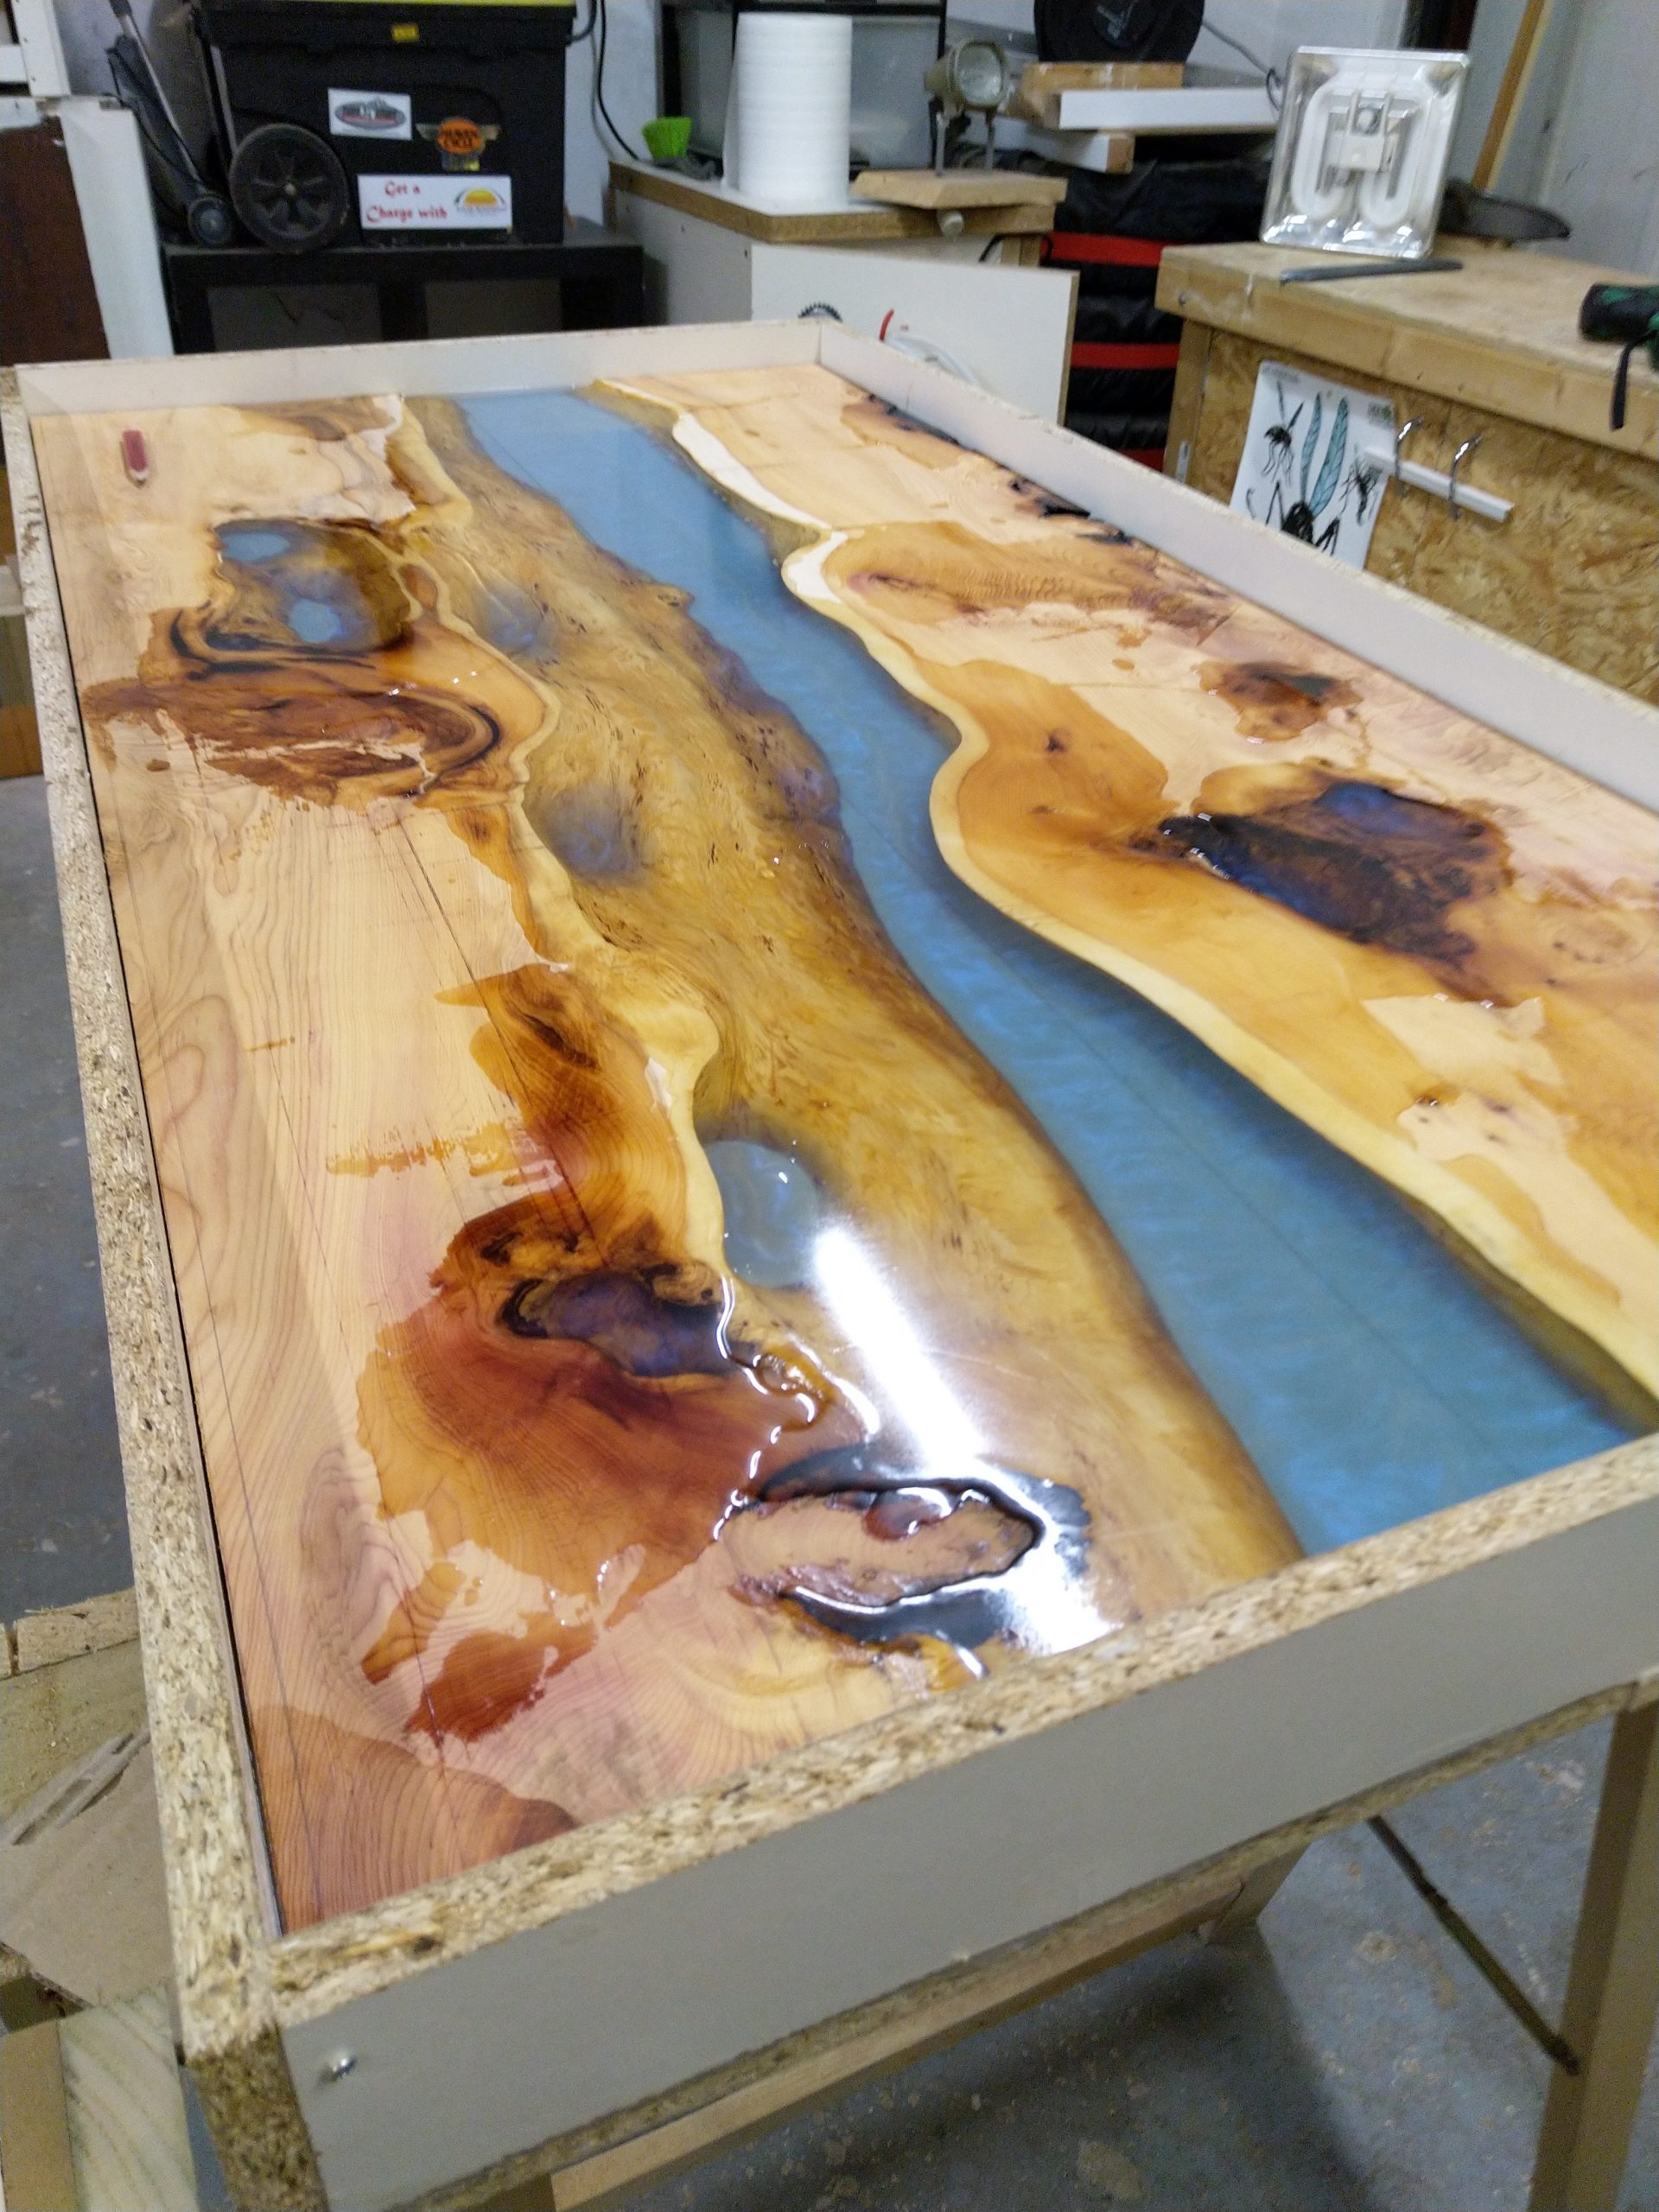
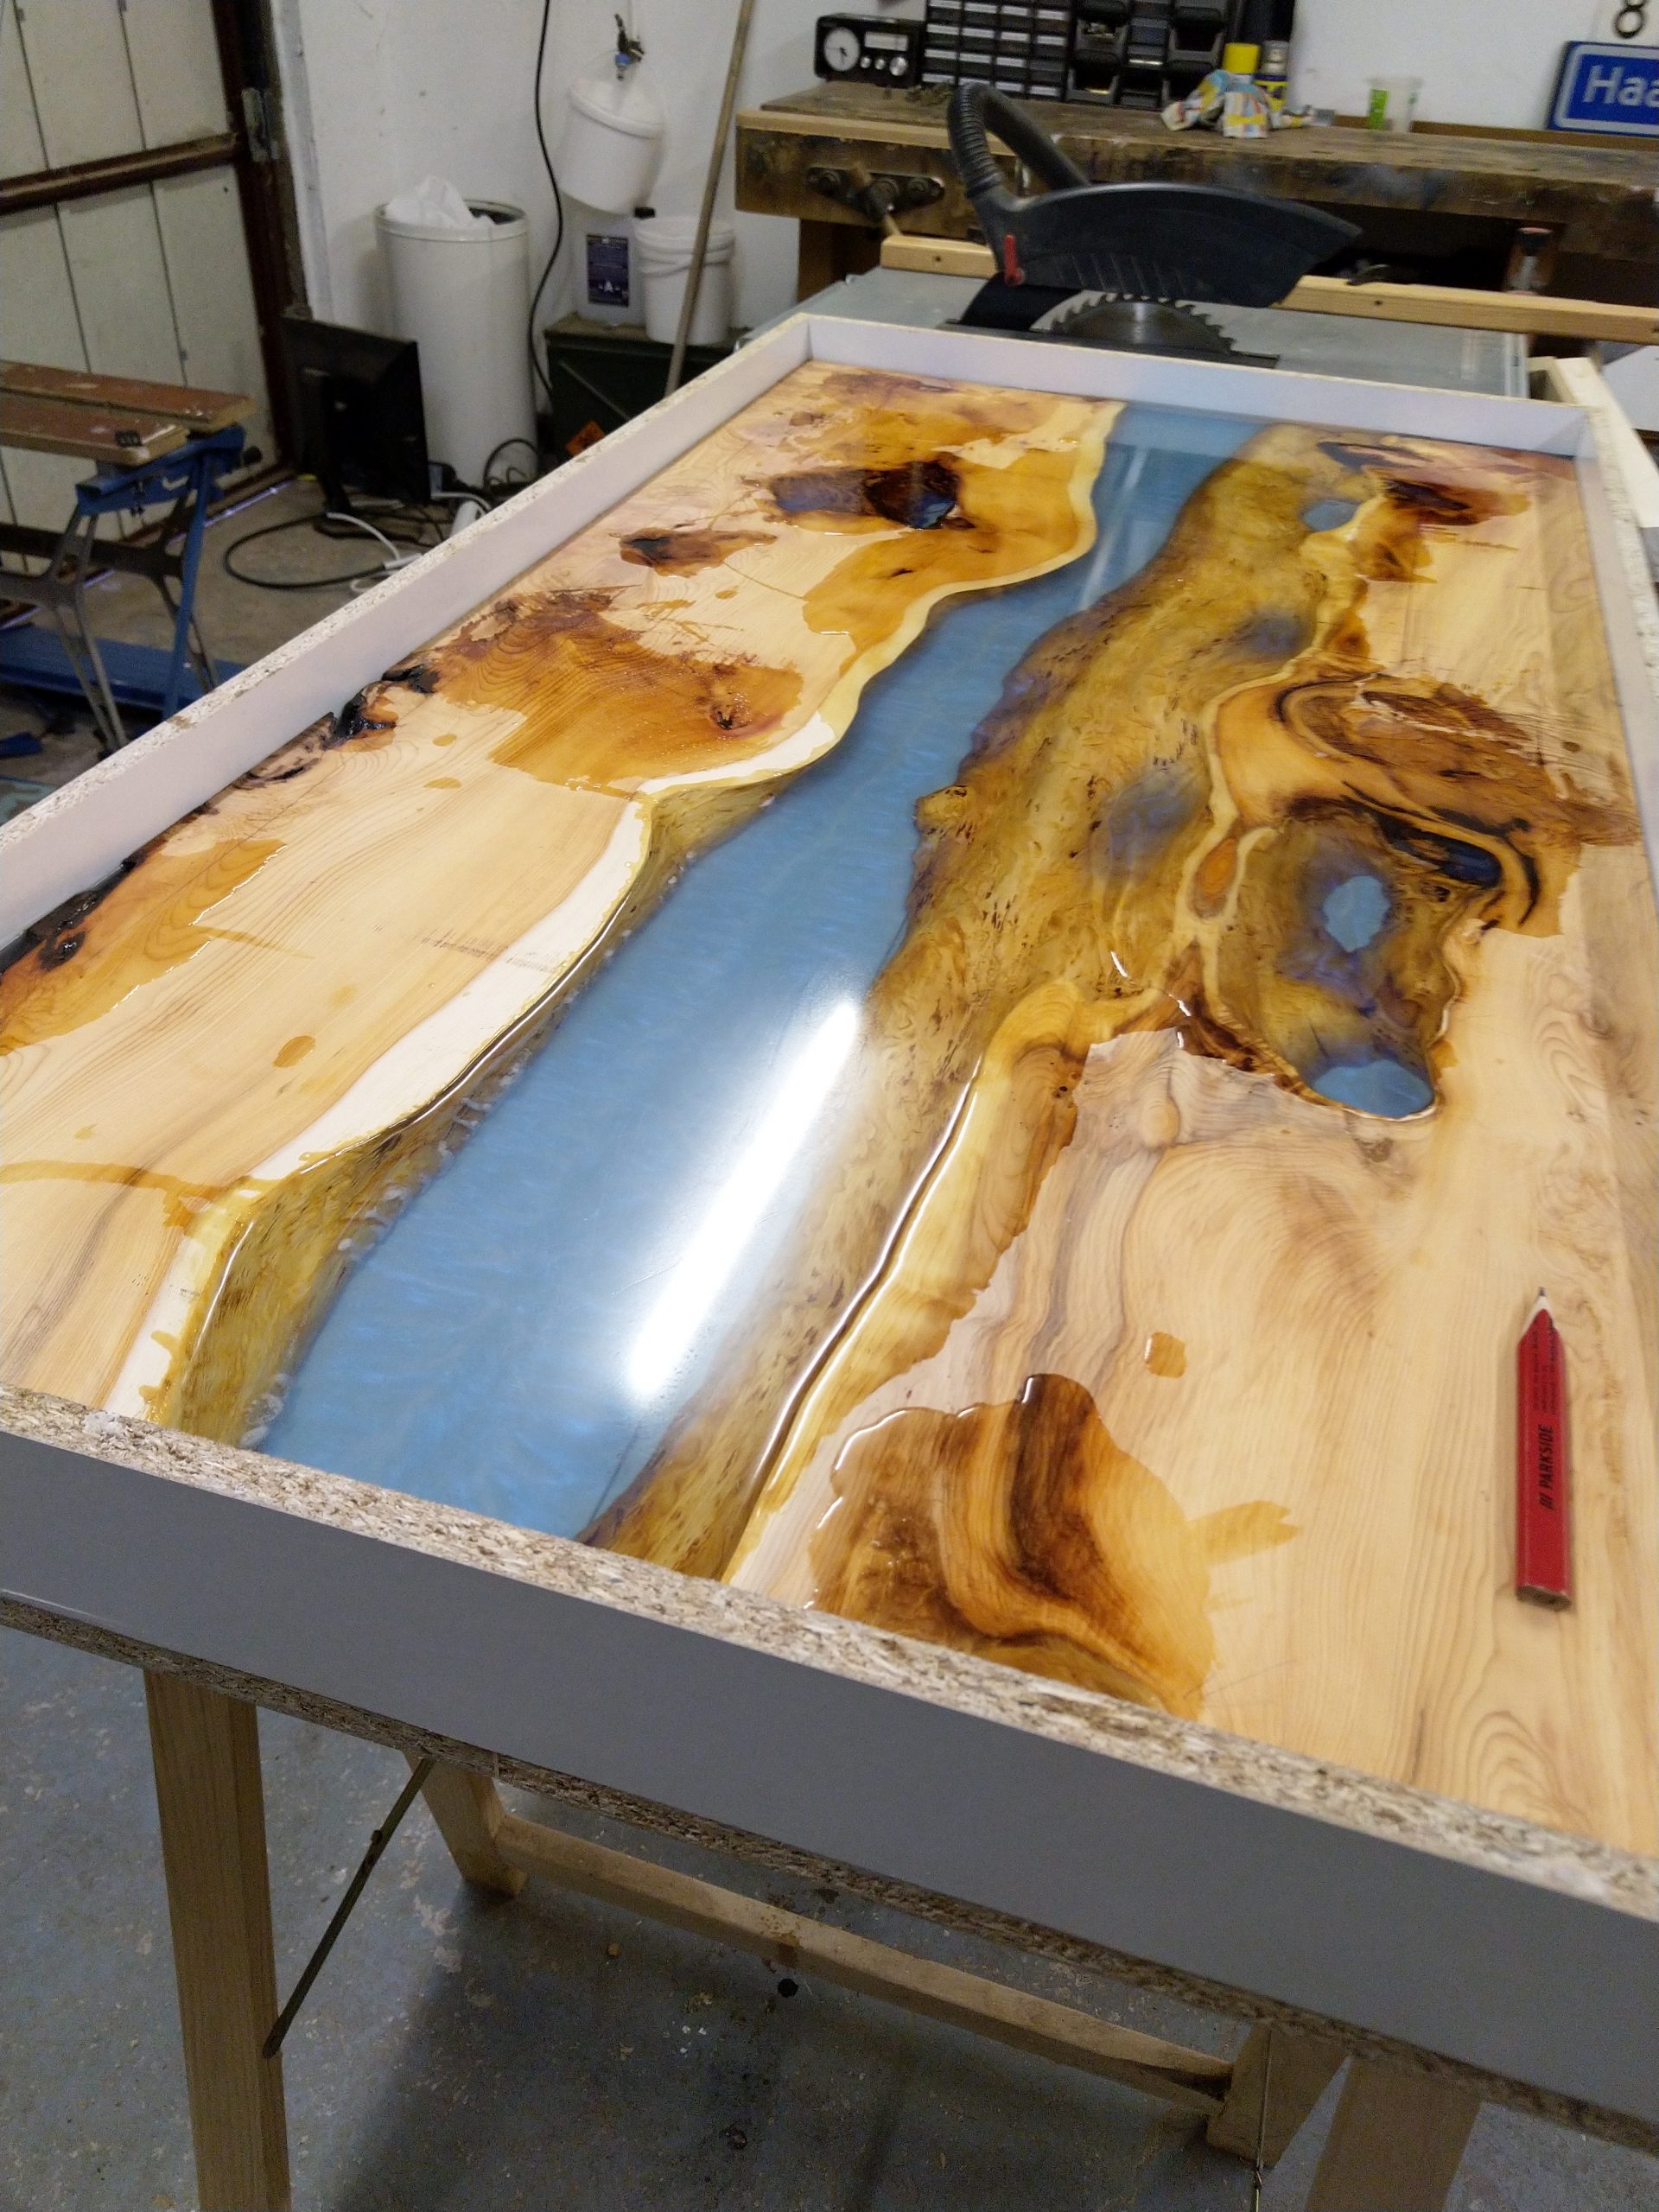
A couple of days later I poured the second layer. It was a bit cold in the garage, which caused very pinpoint sized bubbles. Again, heatgun to the rescue! After curing I poured the third and last layer. This one was really without any problems and bubbles. I let the entire slab sit for a couple of weeks before removing the mold. It came off surprisingly easy. The vaseline-spray really helped with that.
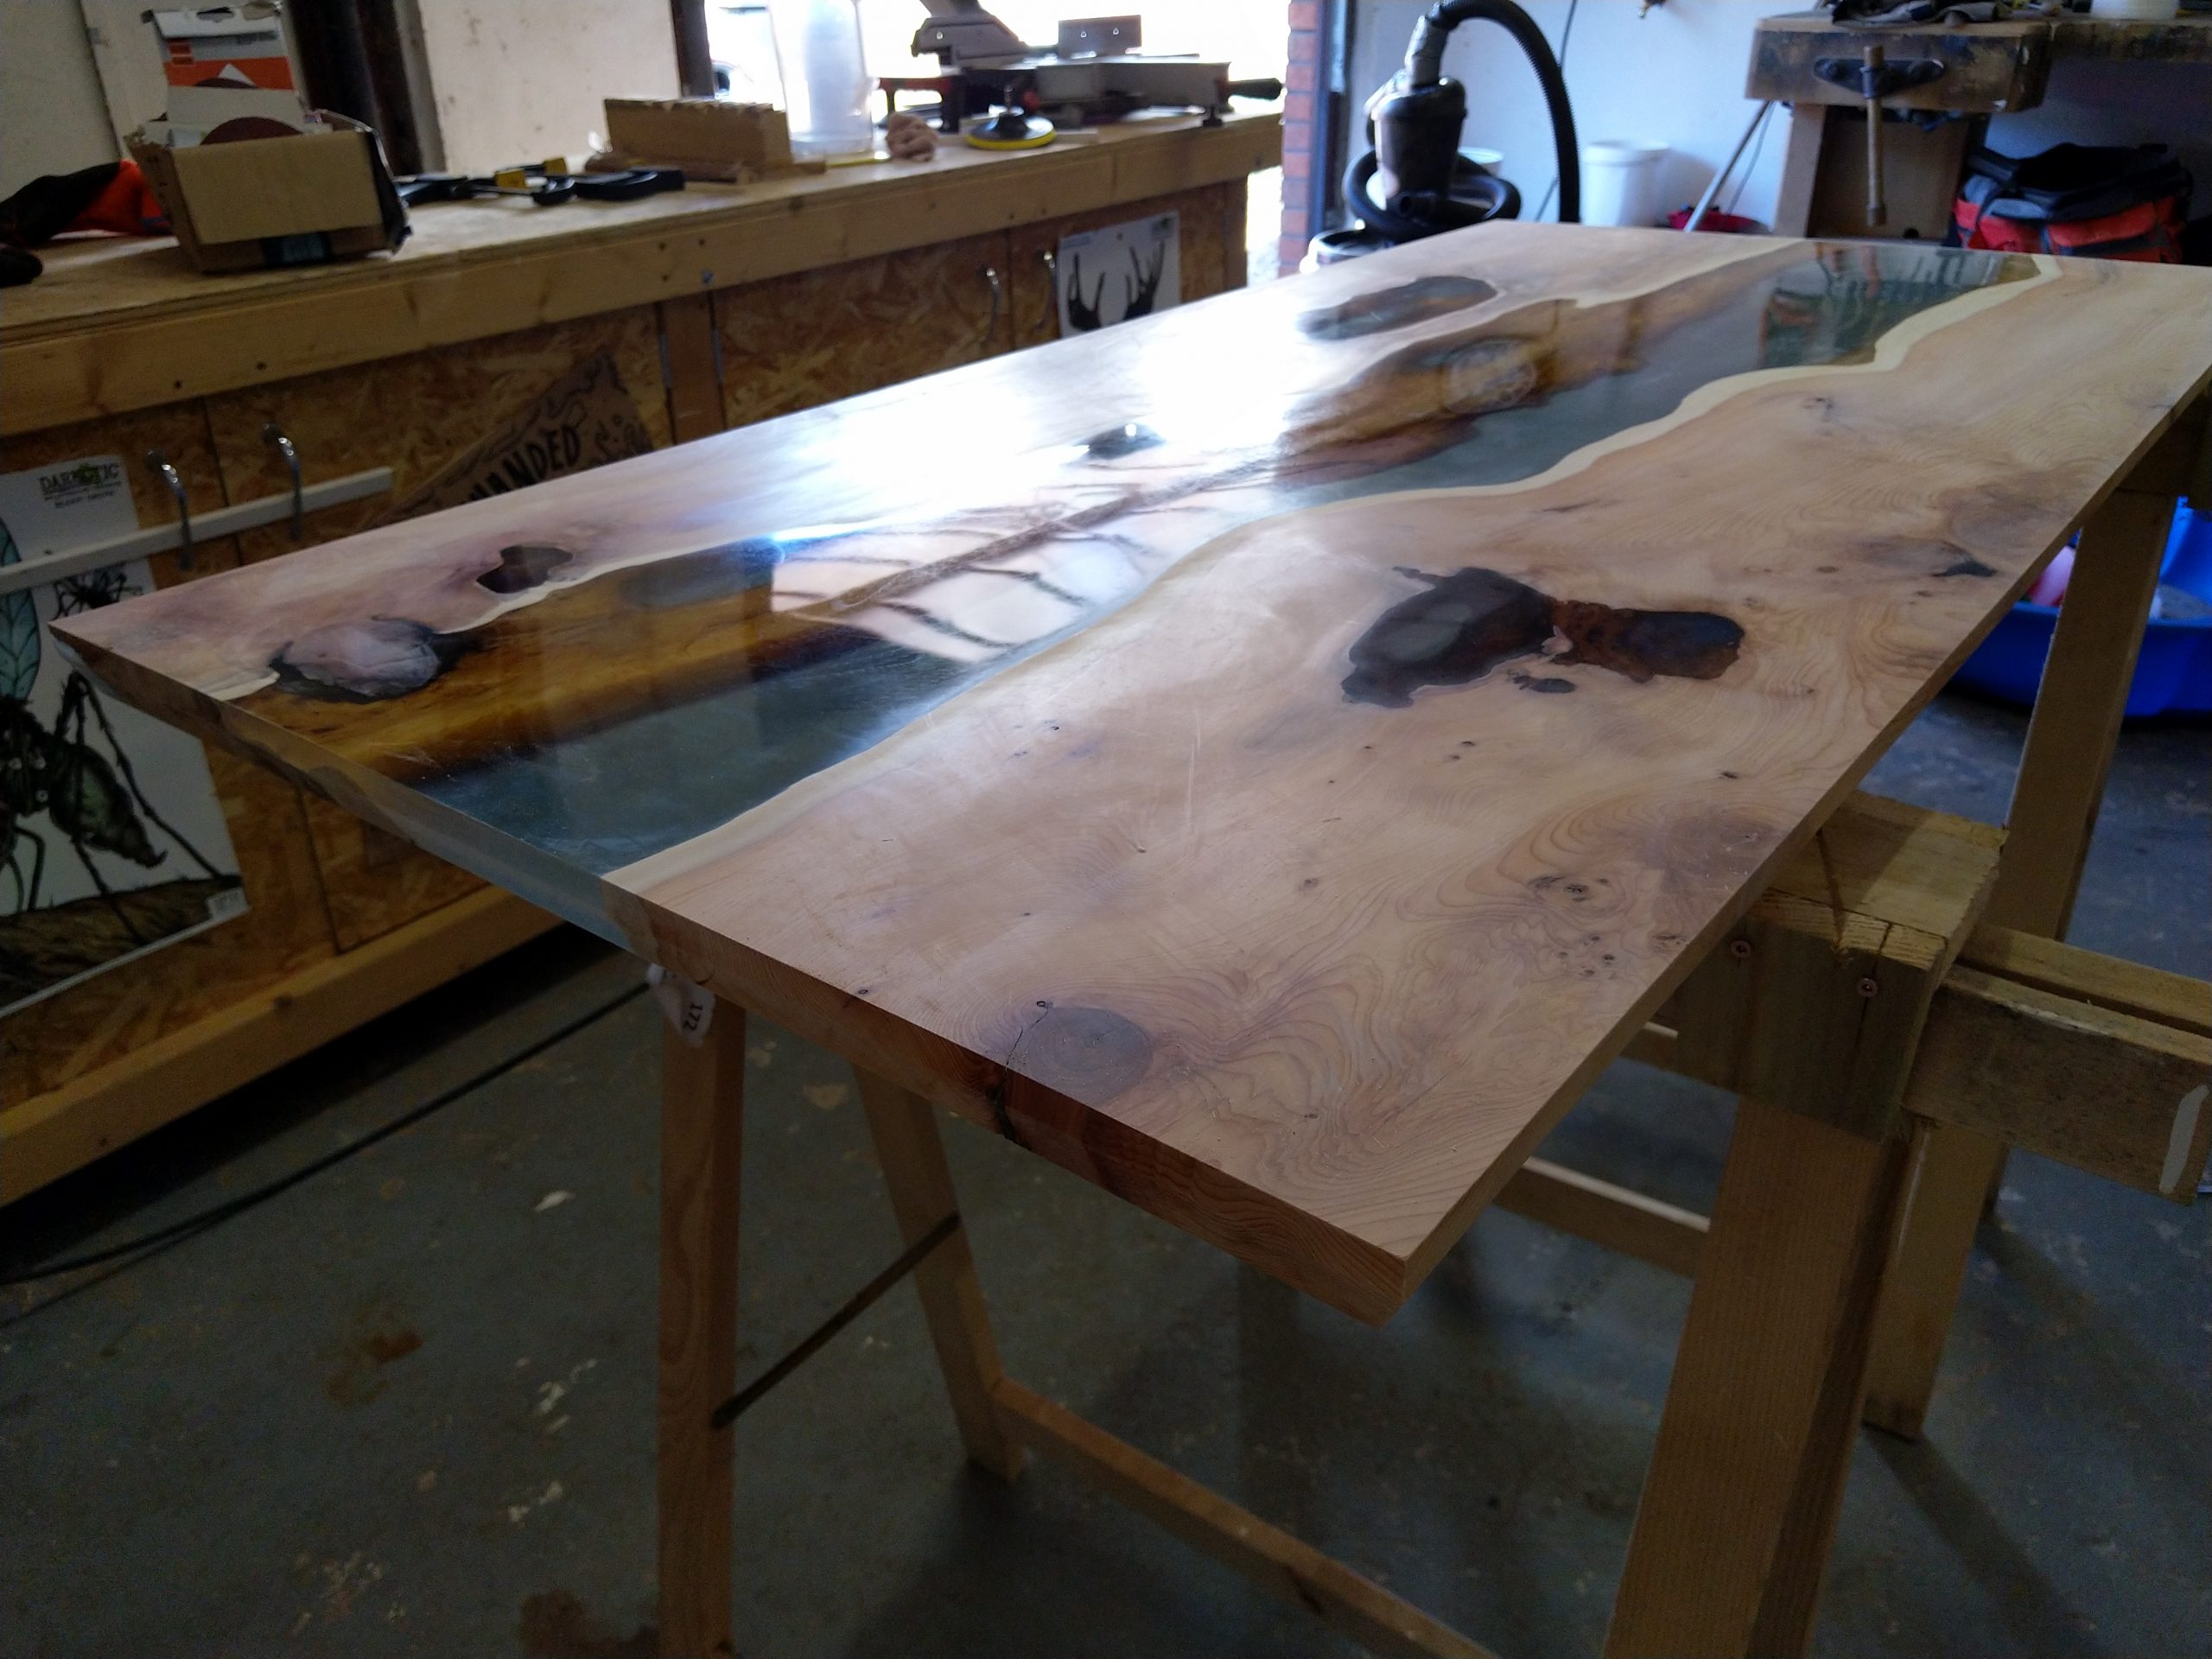
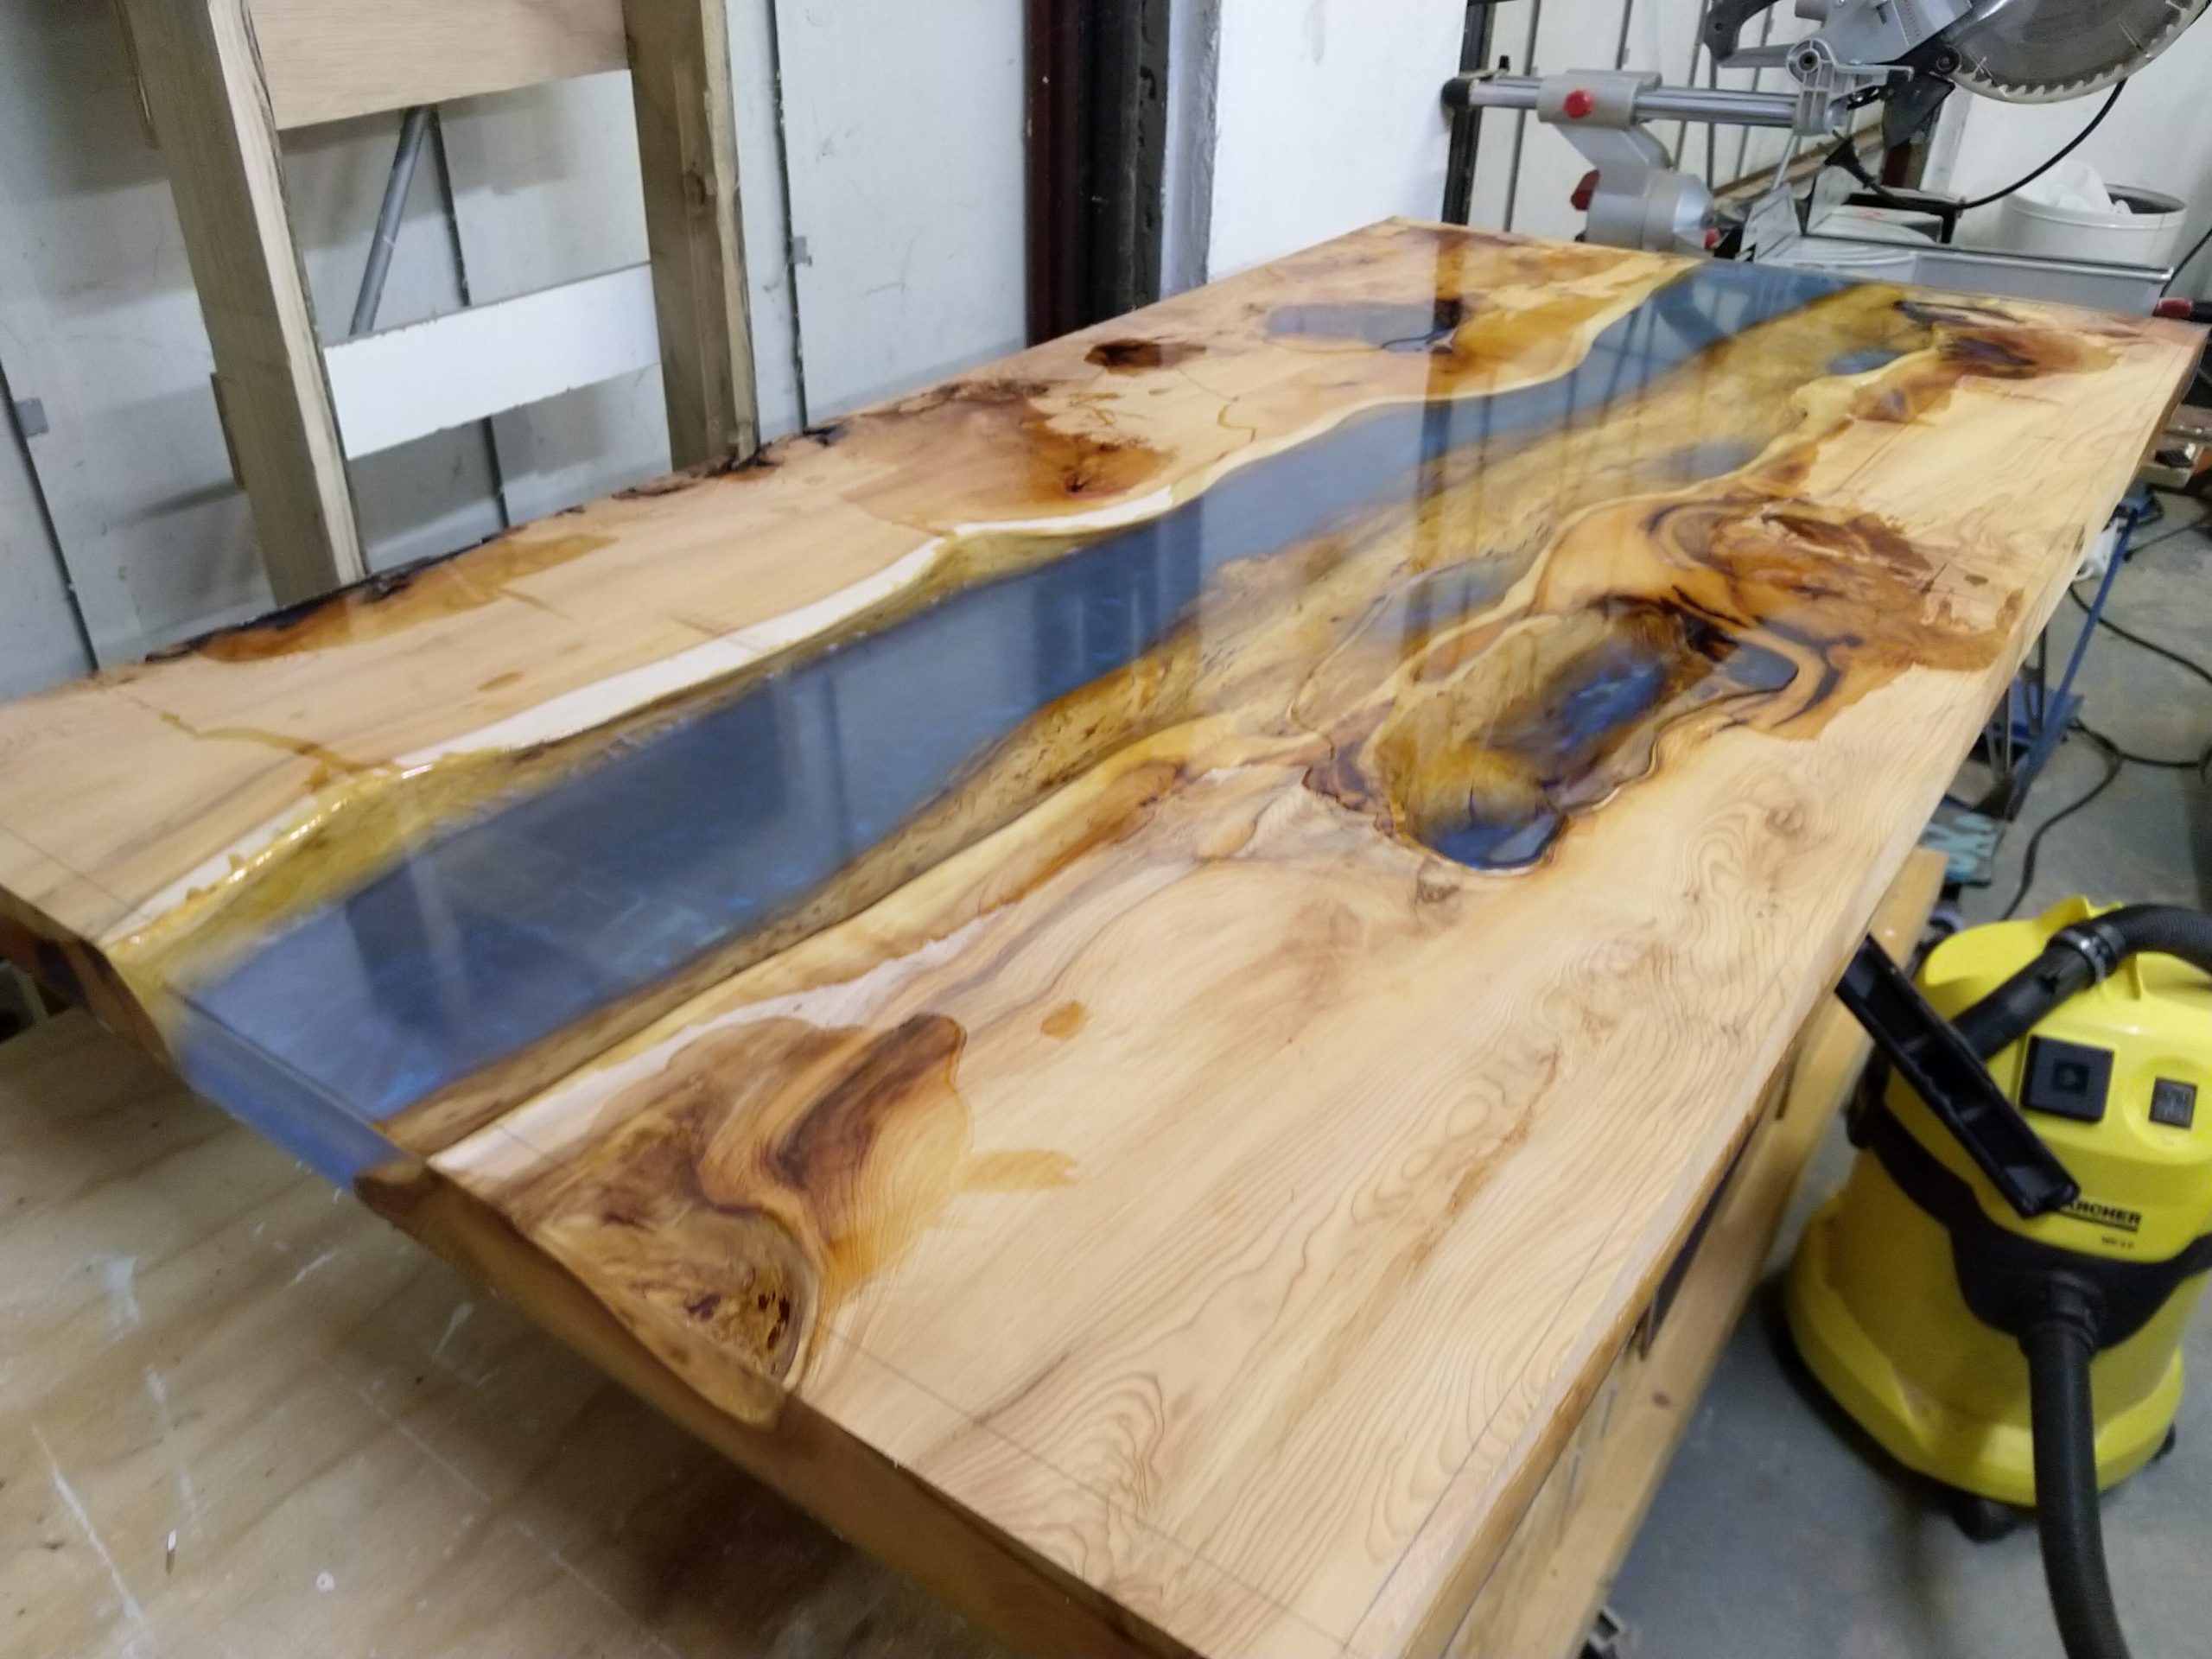
With the tabletop on the workbench I took of the sharp epoxy sides to prevent cuts. I loaded it up and took it to Reynolds Collcutt to plane the slab. At their shop they have an extremely large drum sander which is wide enough to fit objects this size. As the machine can only take 0.2mm off in one pass, we had quite some passes to go. The result was very much worth it though.

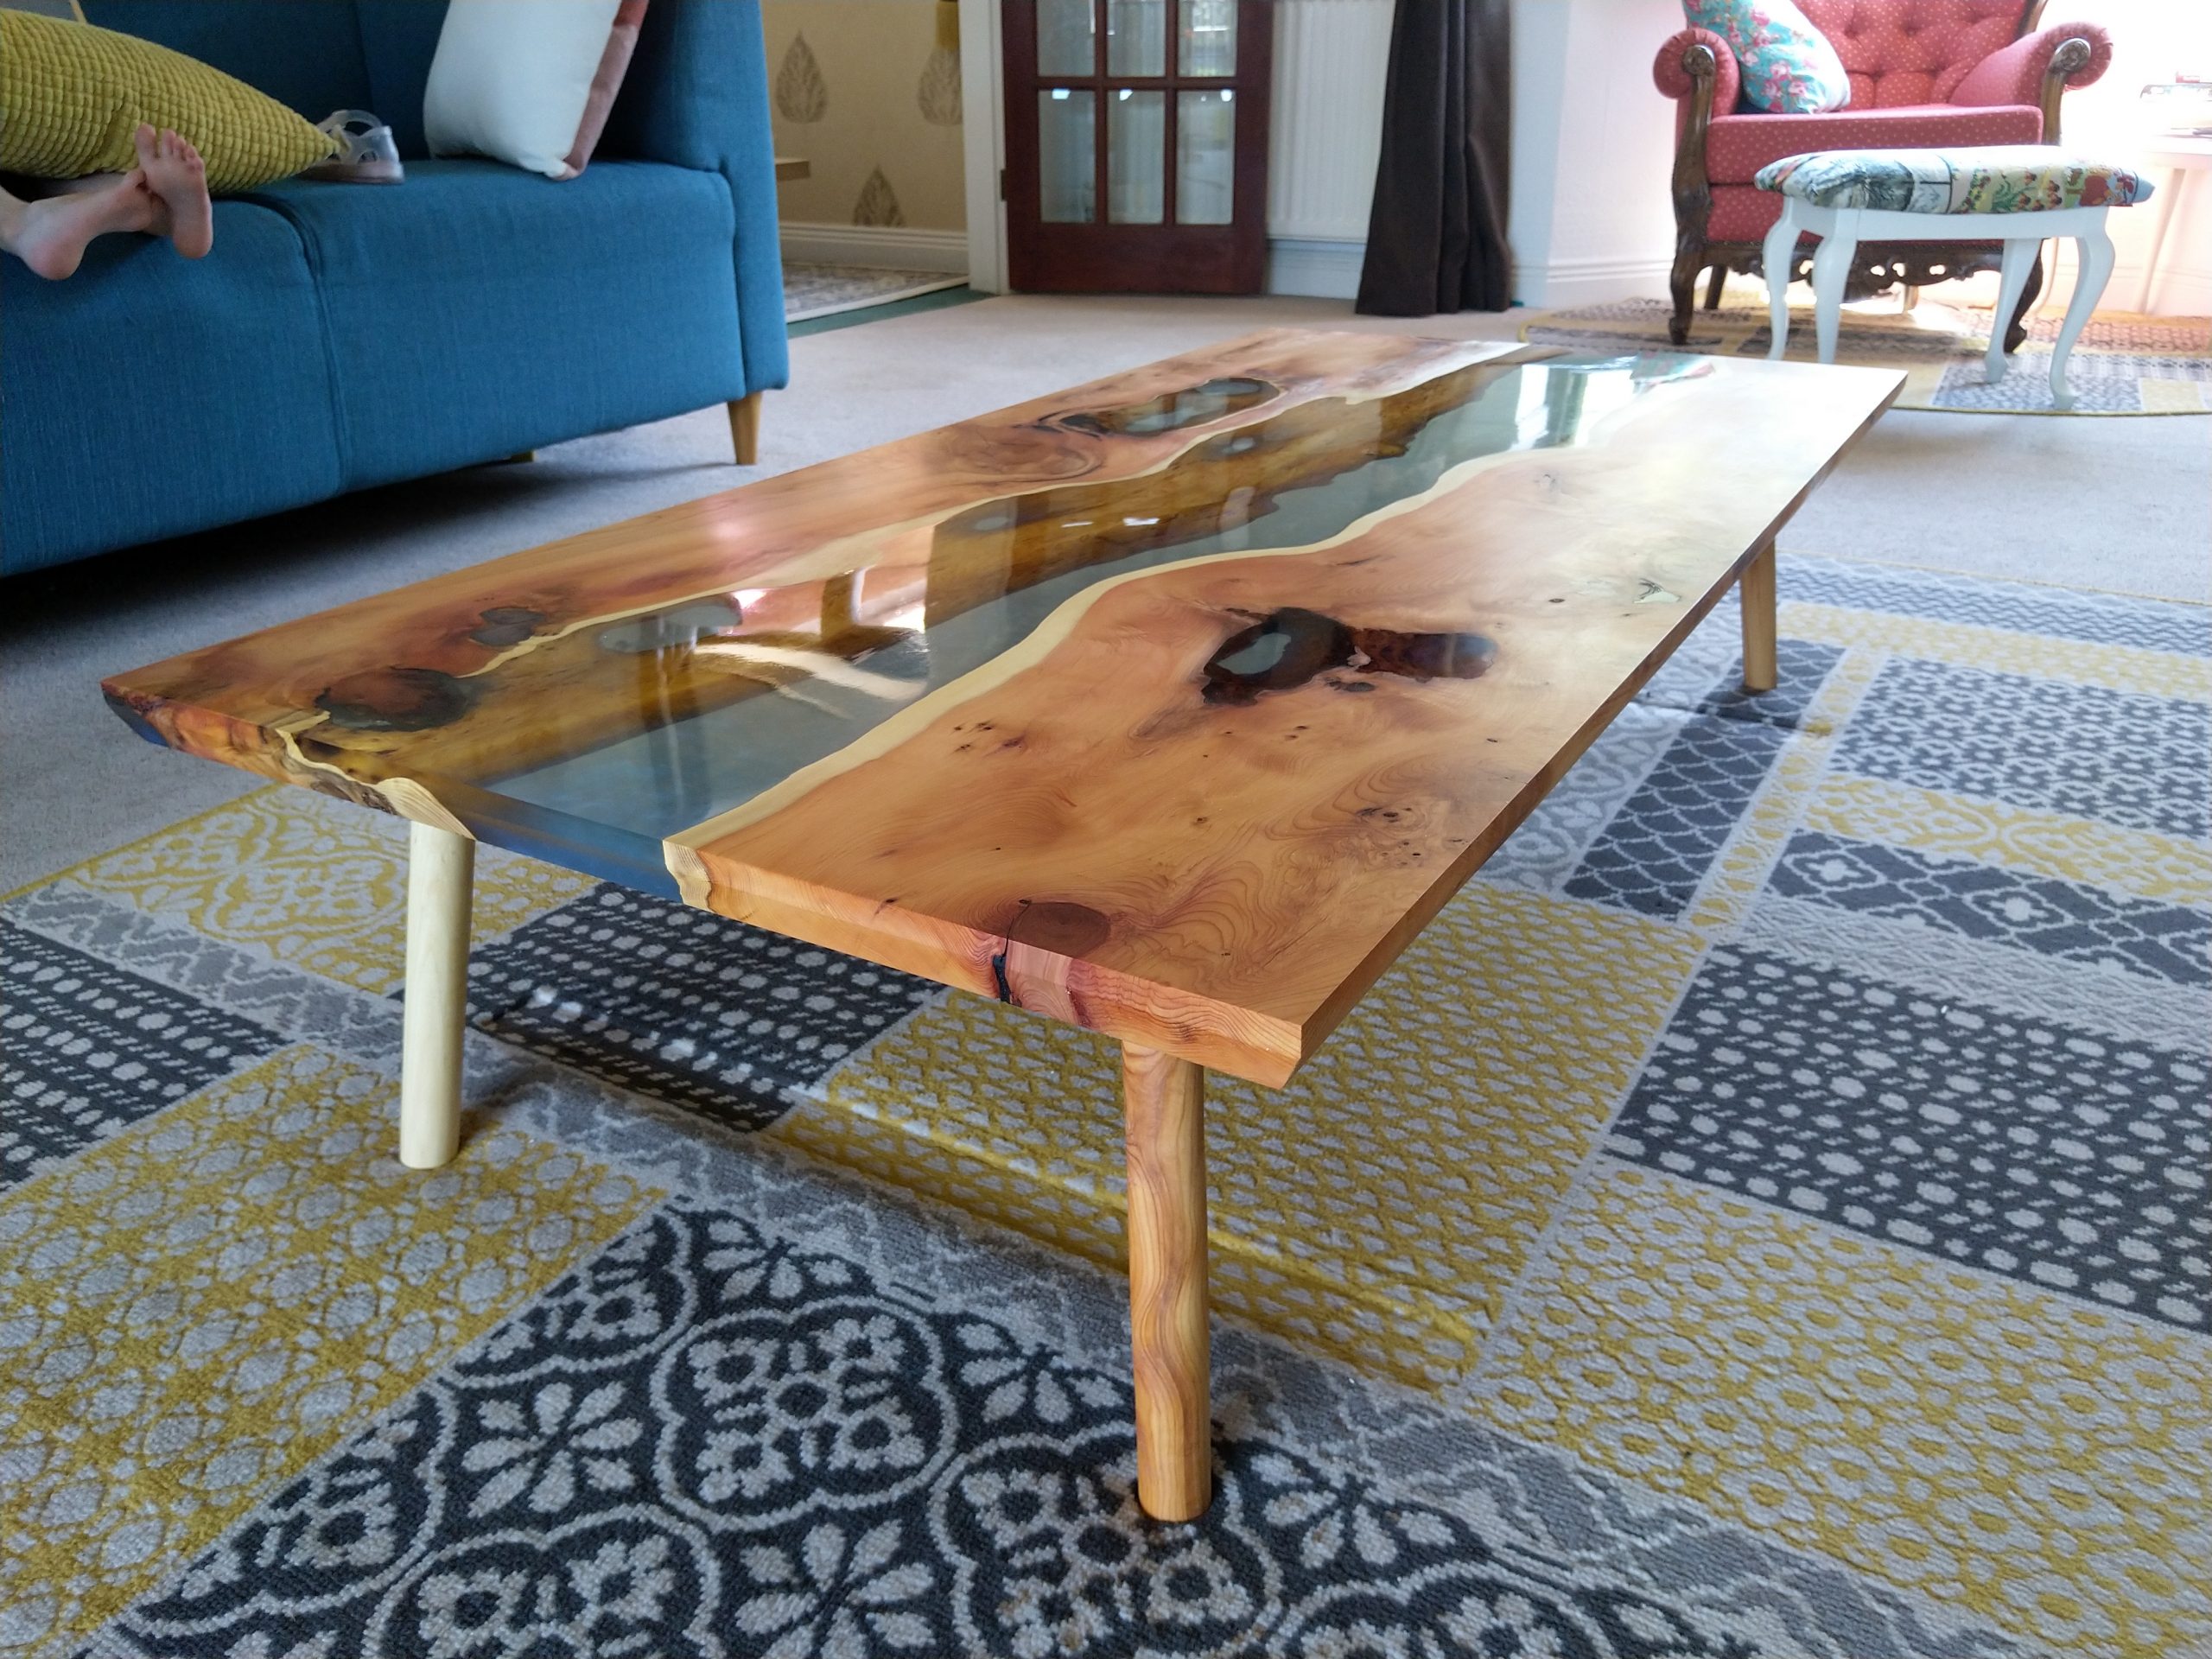
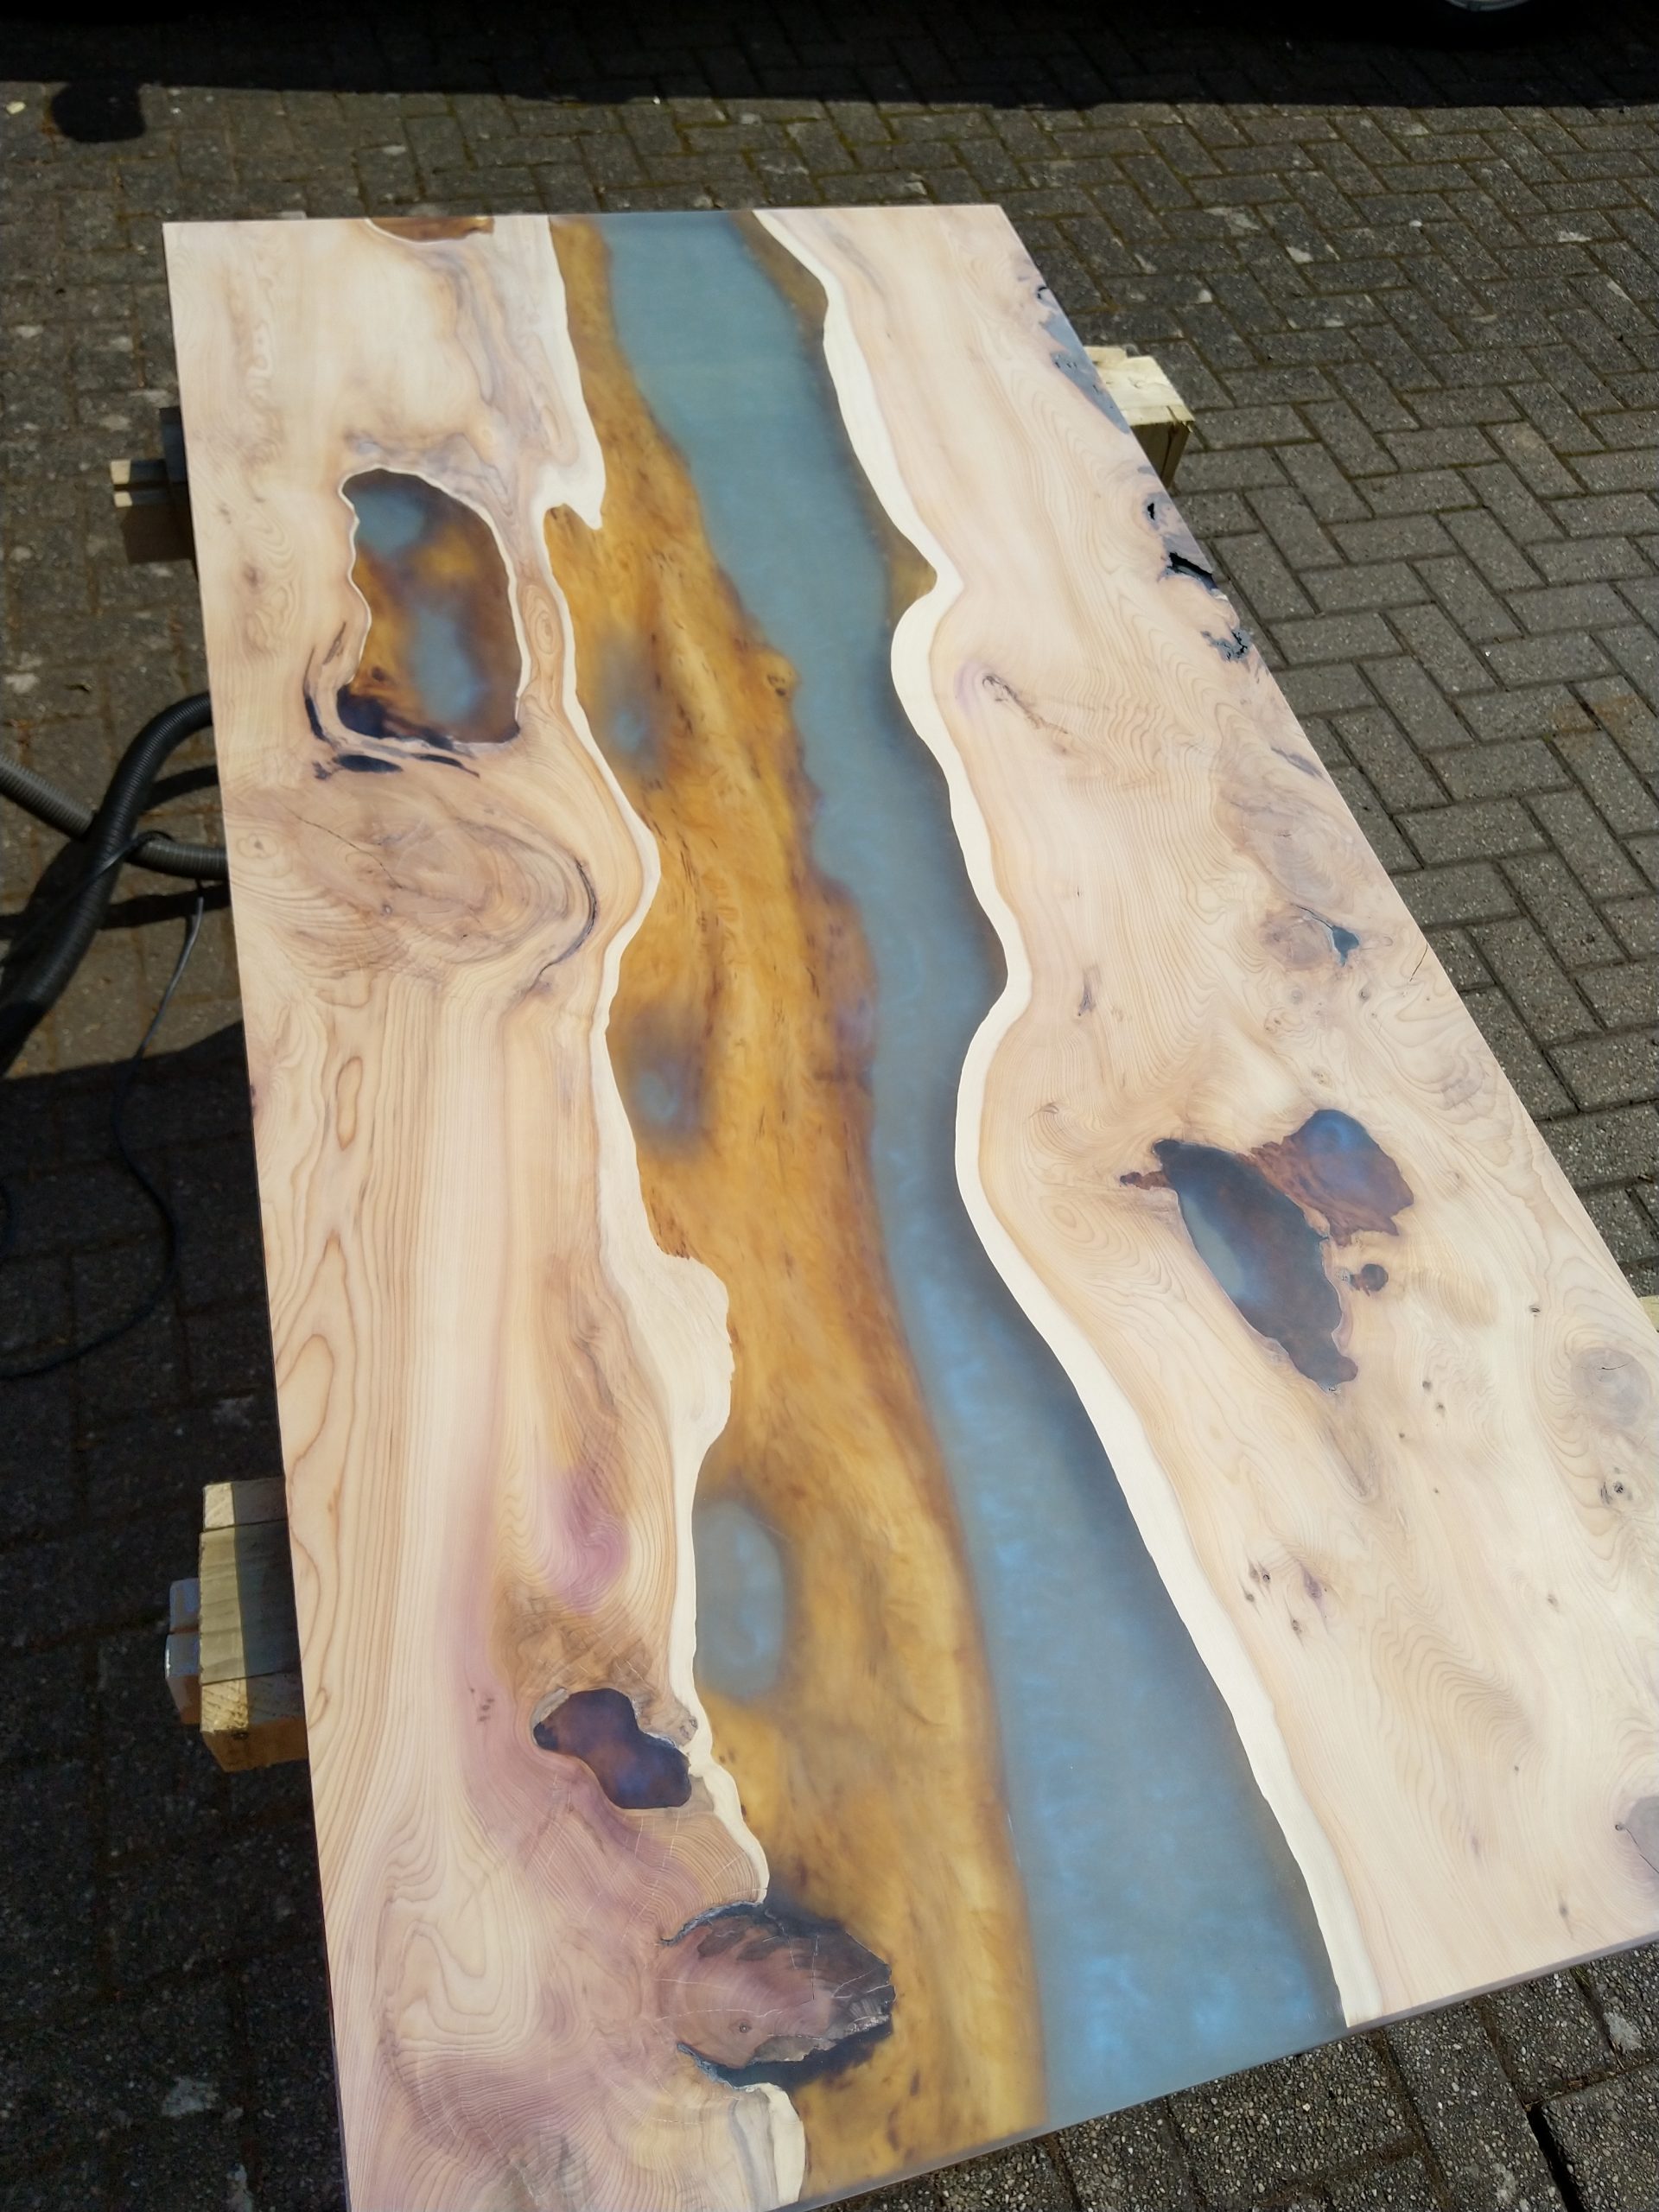
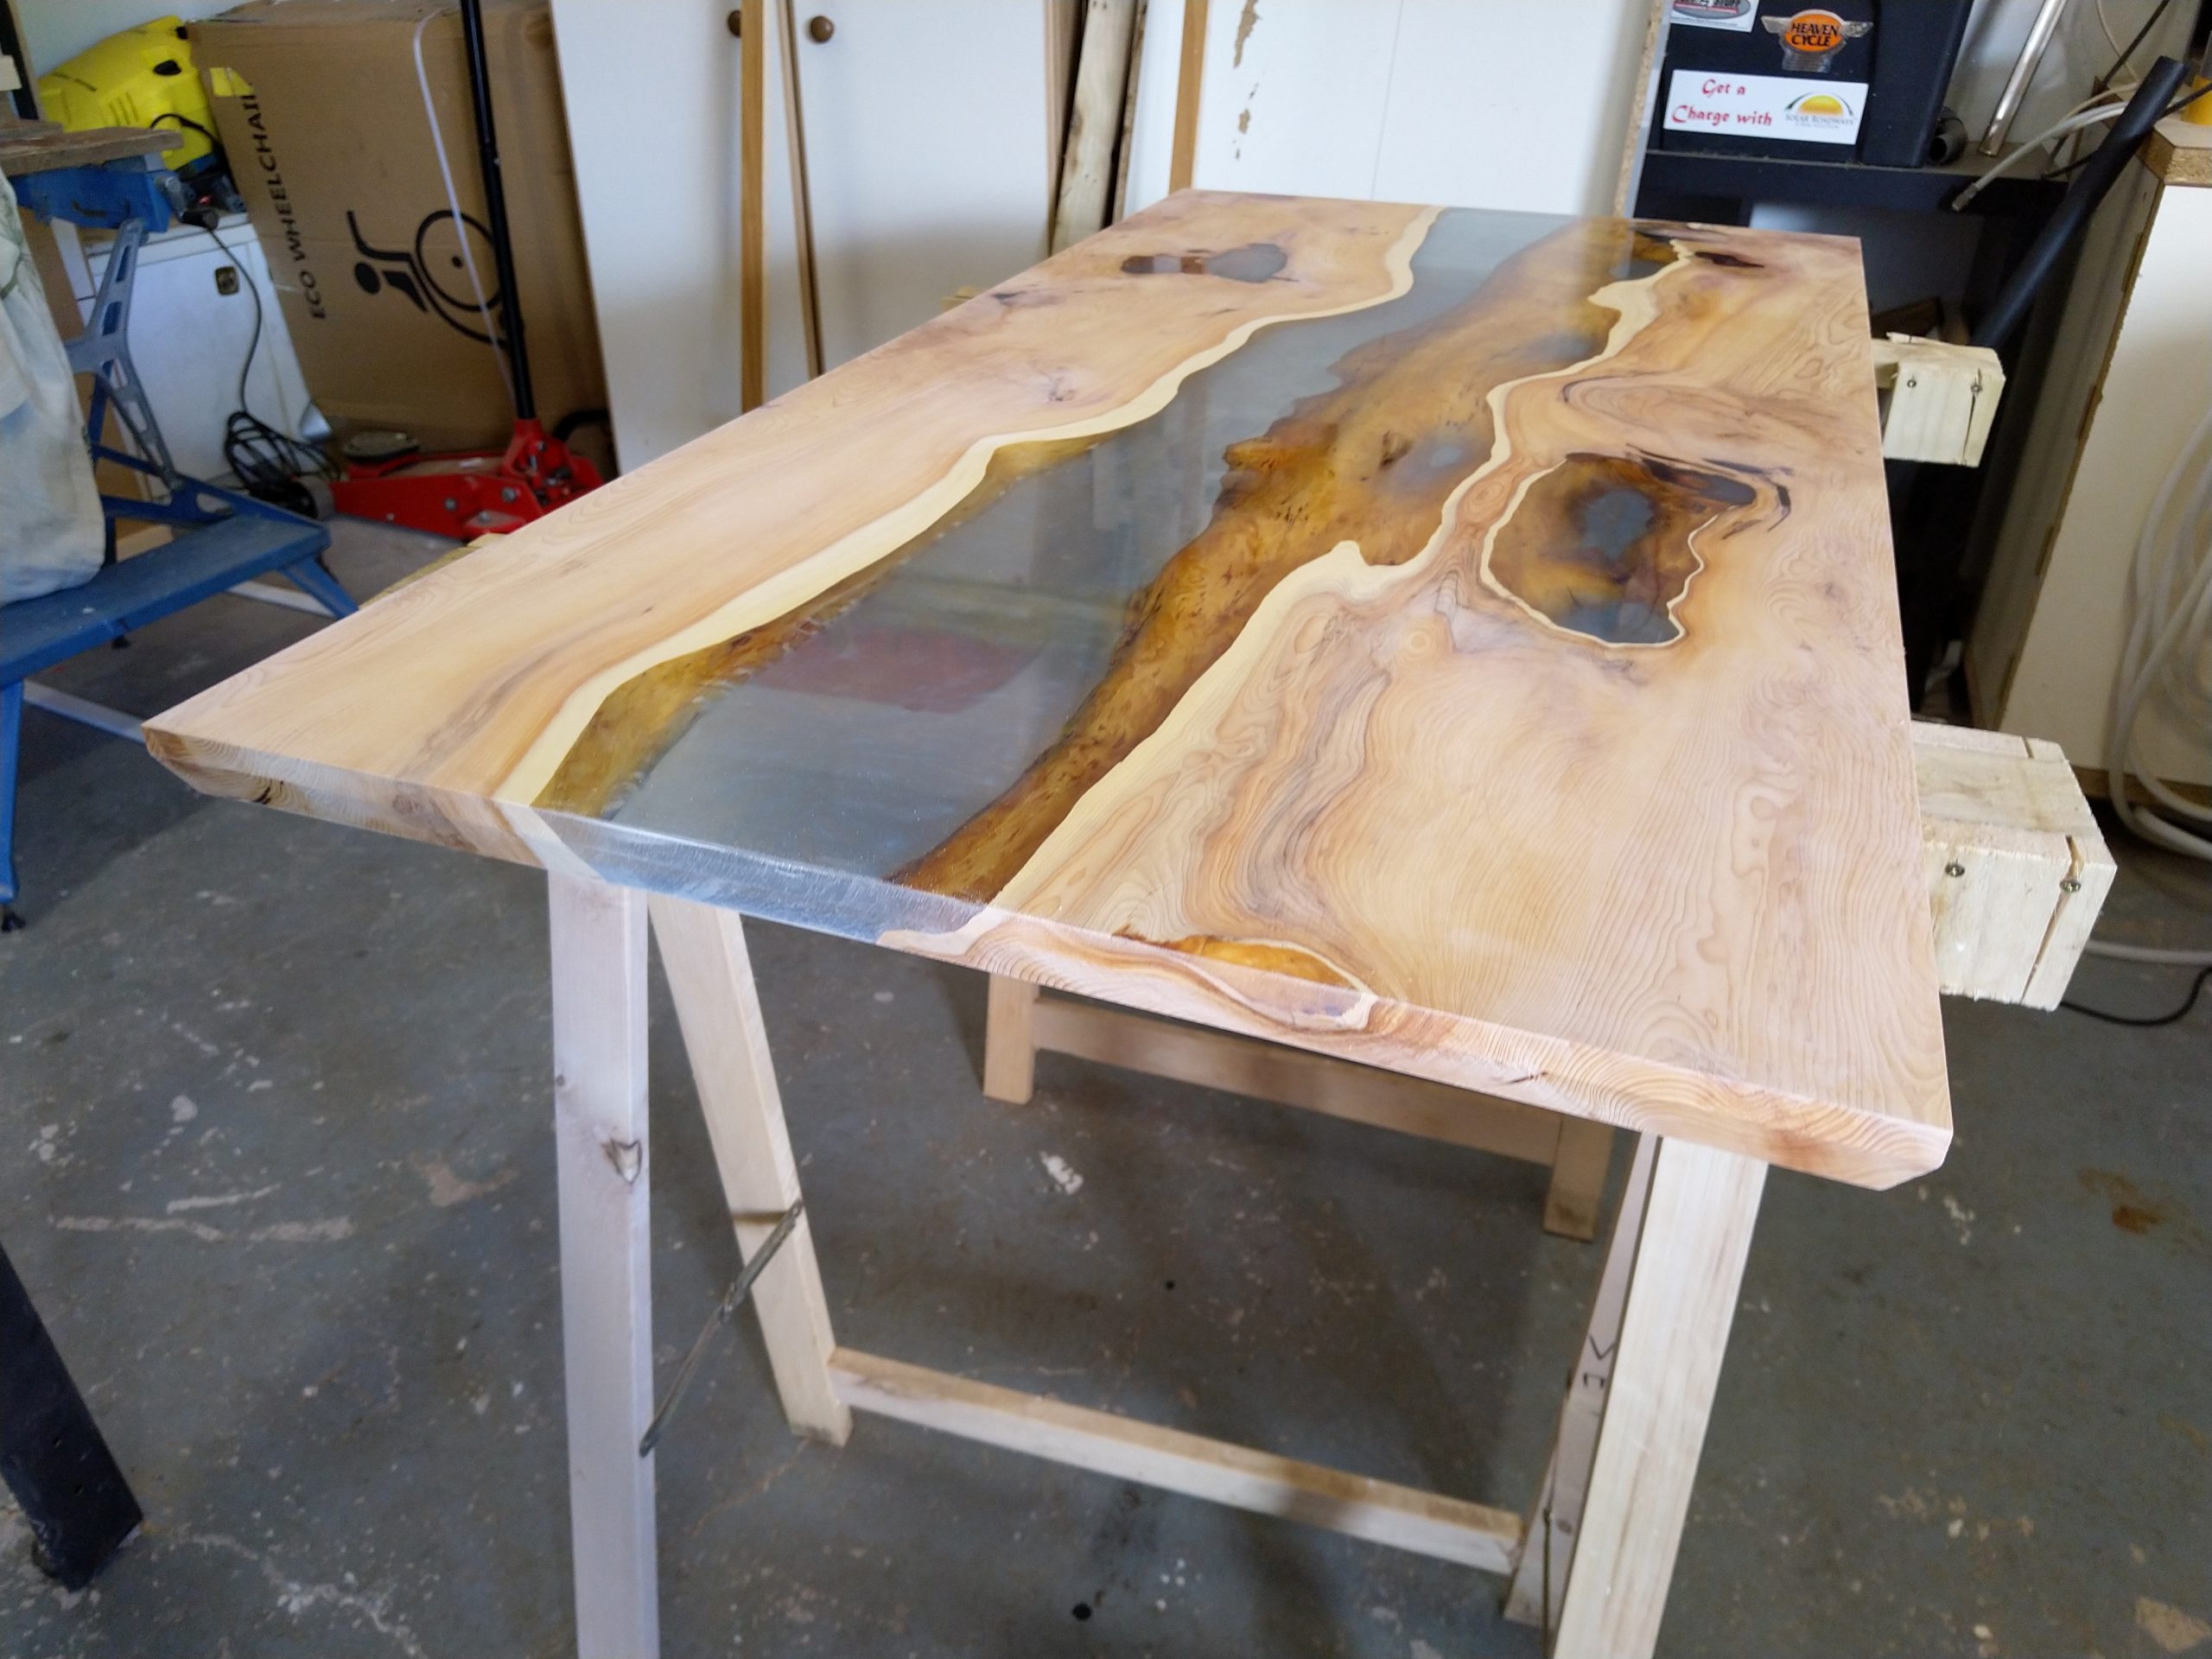
Back at home, I sawed the slab to its final size. Then the sanding began, building up from 40 grit to 280 for the wood, and 2000! for the epoxy. I had to use a lot of paper as the epoxy tends to clog it up extremely fast, which then results in pigtails in the surface. After the 2000 grit, I used car polish (and quite some force) to polish up the epoxy. The wood was finished with a couple layers of Osmo. This treatment brought out the amazing colours of the wood and gave it a wonderfull matte sheen.
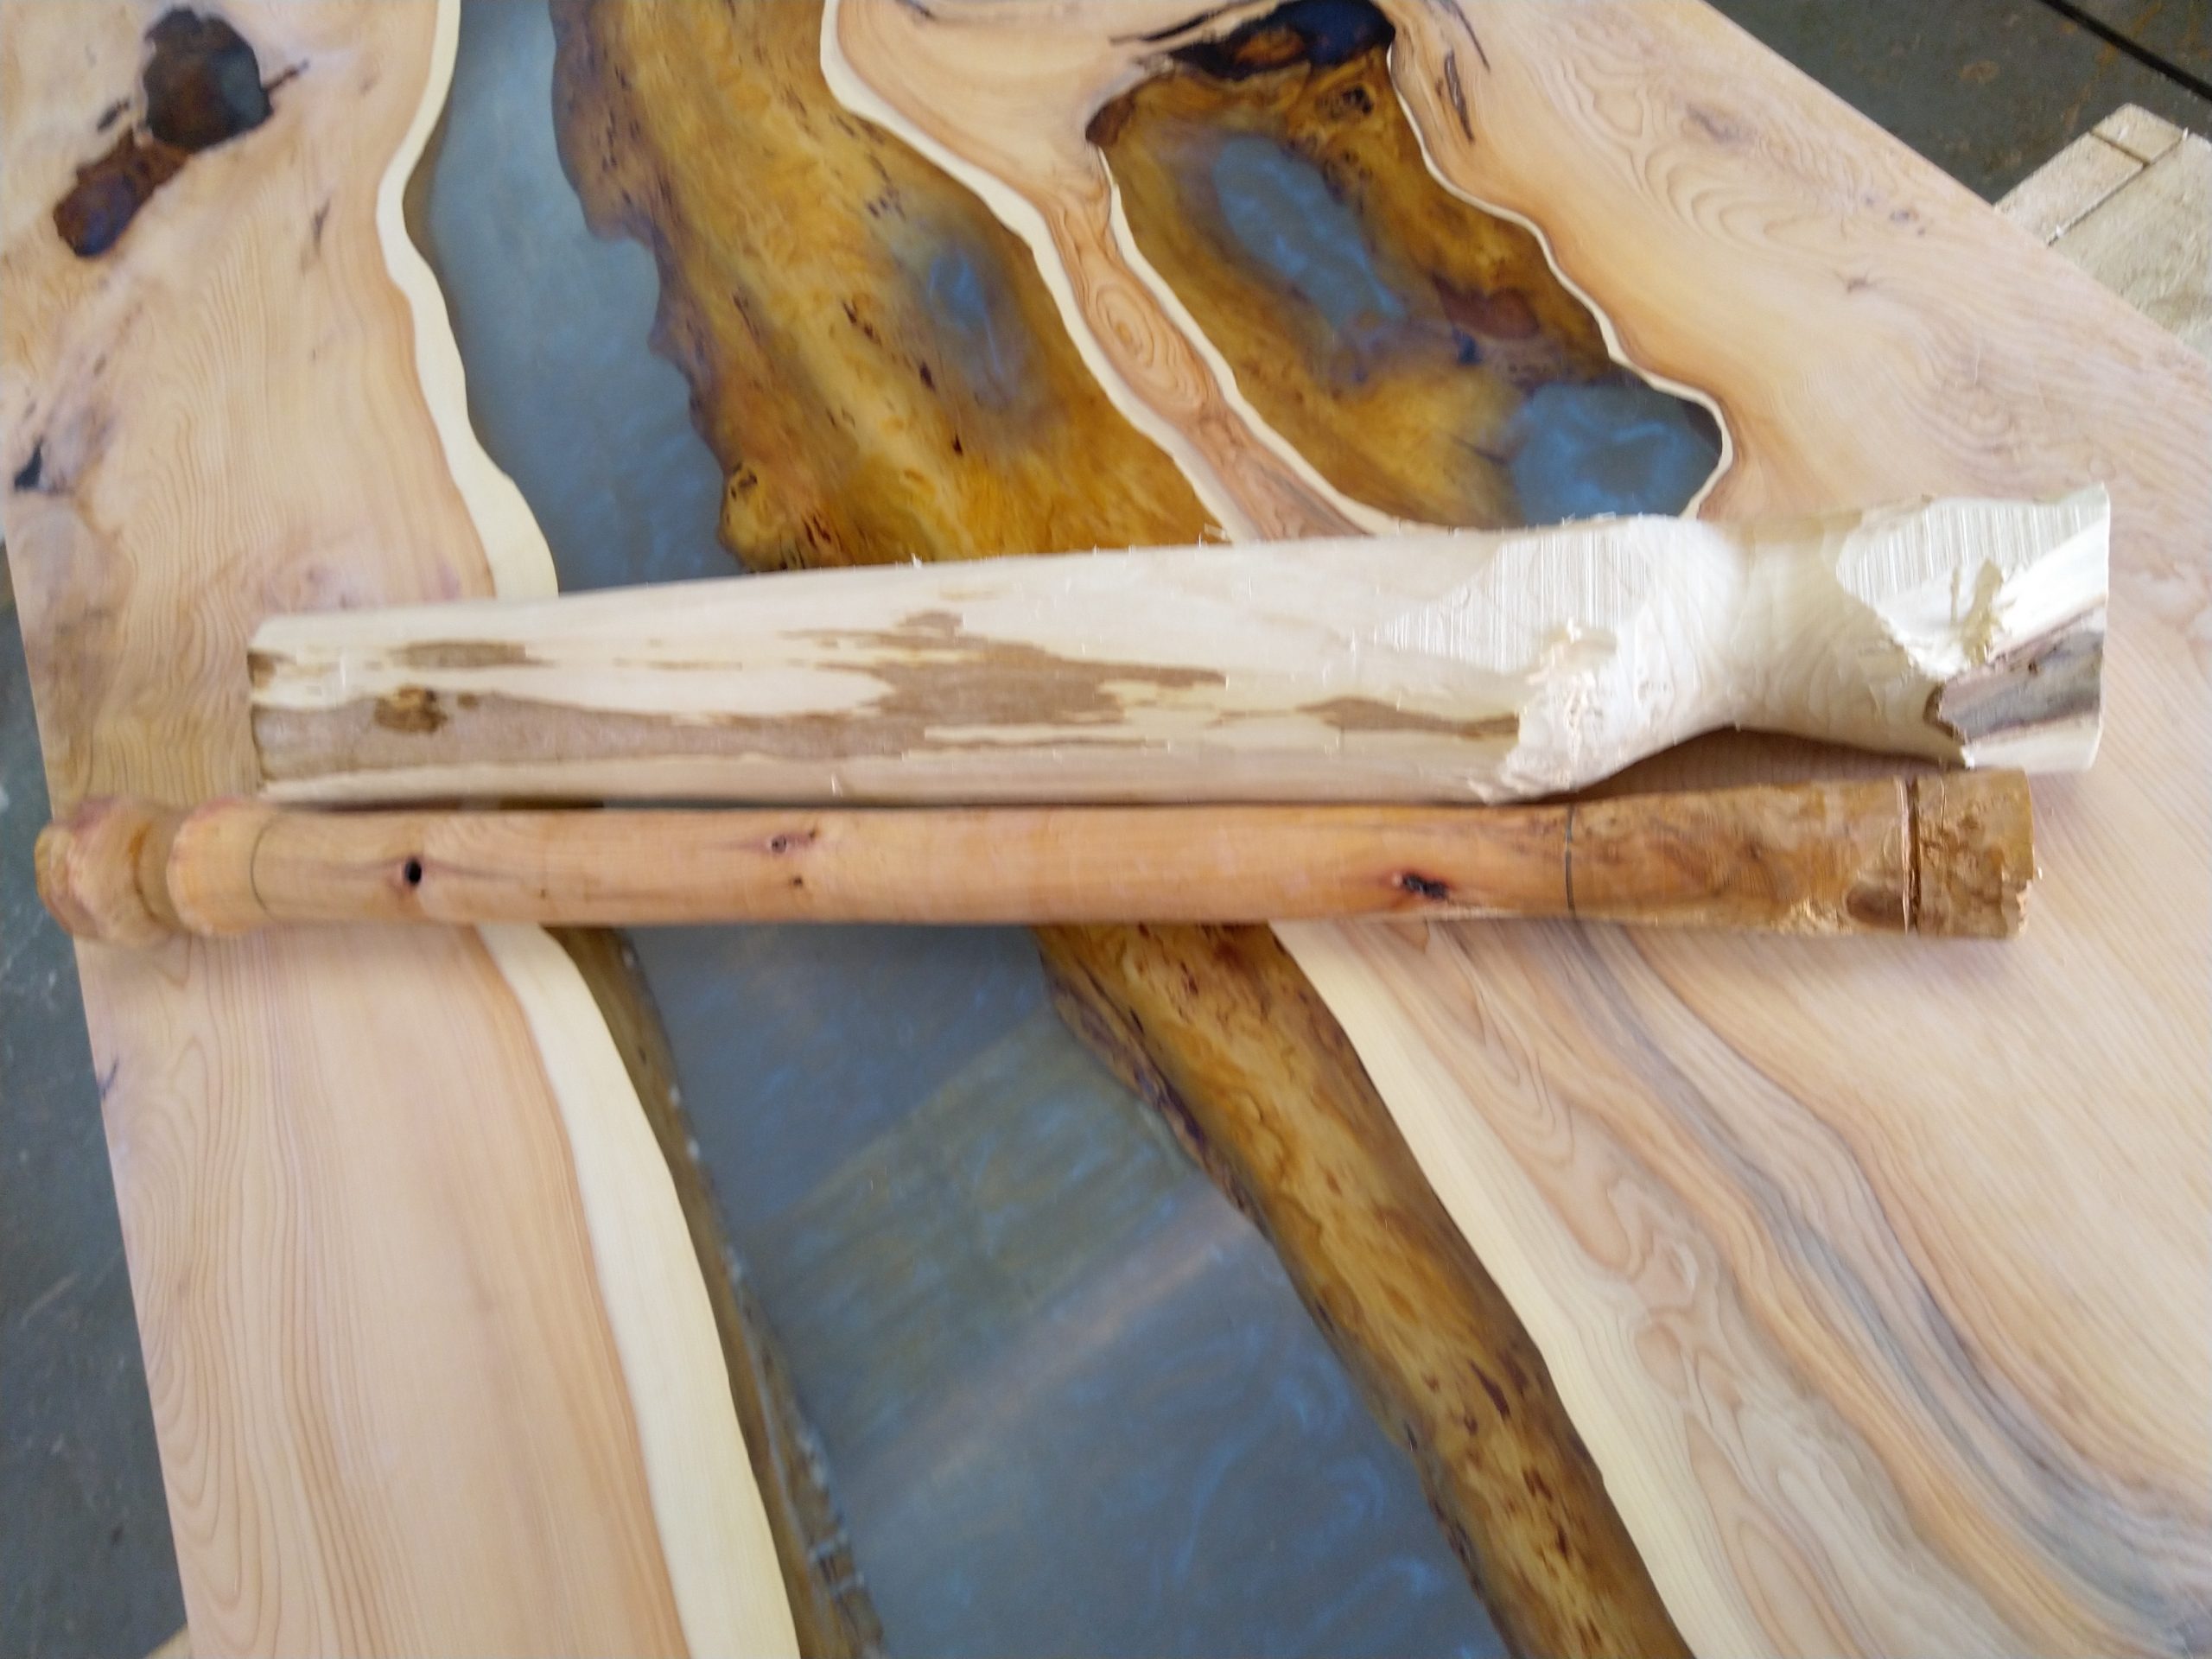
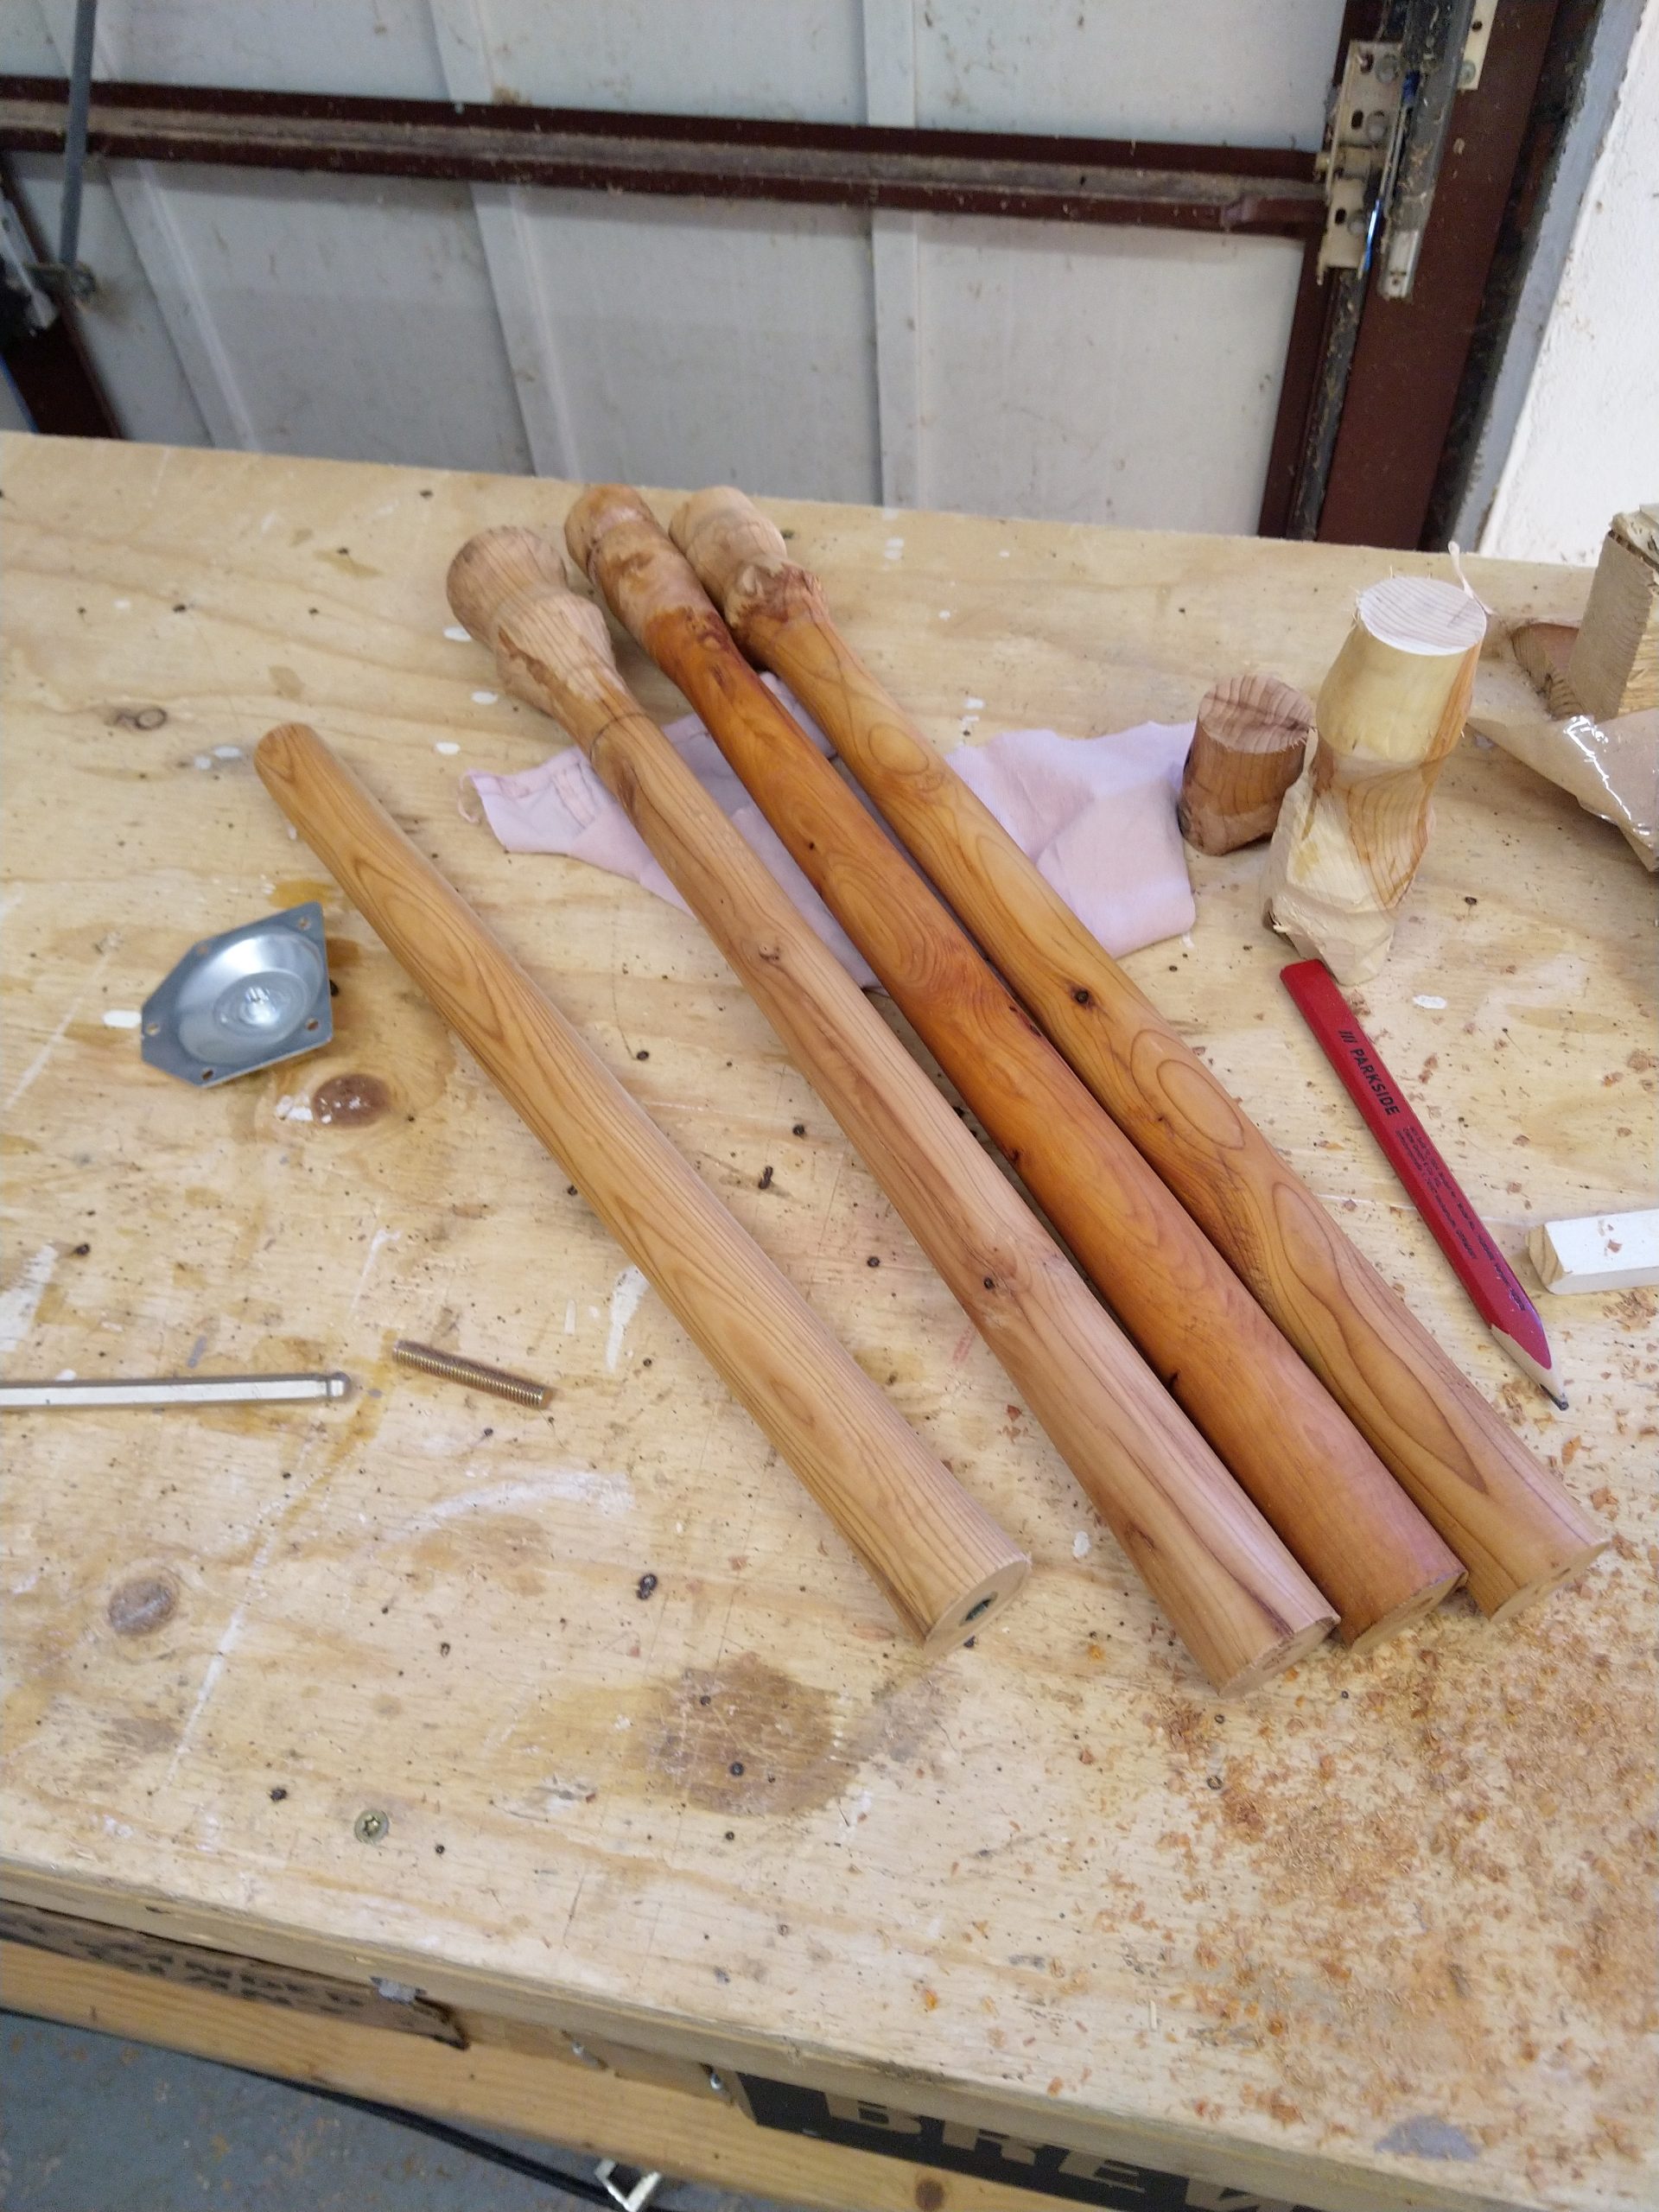
For the legs I also used Yew. I turned these at the bodgers, and treated them with Osmo as well. I kept them as simple as possible, not to draw any attention away from the table surface.
I am very pleased with the achieved result. Especially as this is the first time I took on a project like this.

Recent Comments